|
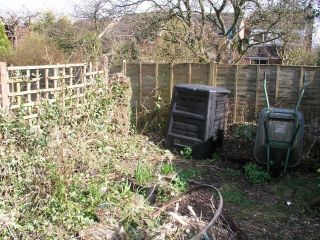
Starting to clear the site. The site became available with the death of an old apple tree the trunk of which can be seen at the end of the trellis fence on the left of the picture. It was covered with ivy which may have been responsible for its death. The area is our compost area and the main space to be cleared was a nursery bed which, as you can see, had reverted to a wild-life garden.
9th March 2009
|
|
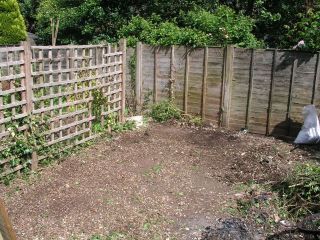
Cleared enough to lay out the foundations. The observatory will go at this end, with the roof rolling off to the left of the camera. I found a number of paving slabs in the ground which were laid many years ago and seem to be firm enough to act as foundations. To my surprise they are close to level.
23rd June 2009
|
|
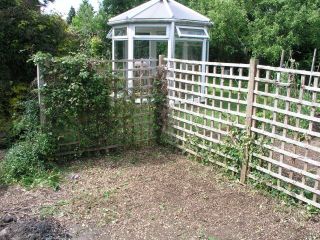
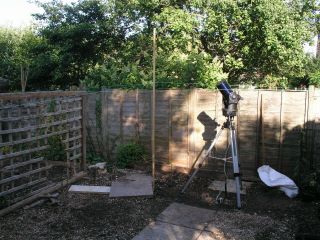
The other end of the site where the supports will go close up to the fence. The camera is looking north, so the roof will roll off roughly north-west, but there is an enormous ash tree blocking the view in that direction, so the roof will not get in the way.
23rd June 2009
|
|
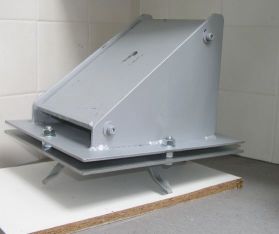
A local contractor made this wedge for me for about half the price of one from Meade. He gave me a means of course adjustment in altitude but hopefully that will not be needed as he told me he had set it as near as he could to 28° and what I need is 28° 6'. Fine adjustment in both altitude and azimuth will be done by tilting the whole plate.
The assembly is in two parts. The lower part consists of a plate with threaded bolts sticking up and this part will be bedded into the concrete pillar and metal lugs come out of the bottom to secure it. The upper part carries the wedge itself, and the lower plate has oversized holes for the threaded bolts. Pairs of nuts on these bolts enable the slope in both directions to be adjusted and locked in place. (If I was having another one made I would get longer bolts fitted. The amount of adjustment without removing lower nuts will be very small, so adjustment may be more tiresome than it might have been. We will see....)
1st July 2009
|
 |
Getting my bearings.
The tilting of the wedge does not give me very much adjustment in azimuth (maybe ±2° if I am lucky) so I need to align the pillar with North-South as accurately as I can.
12th July 2009
|
 |
Casting the pillar.
The pillar to hold the telescope was cast in two parts. This will produce a weaker pillar so I have joined the two parts with reinforcing rods.
The page to which this picture links shows both parts.
17th August 2009
|
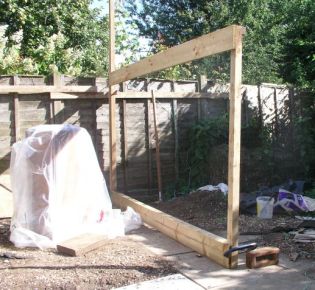 |
Starting to build the structure.
This page describes in detail how I built each section, four of which form the structure.
23rd August 2009
|
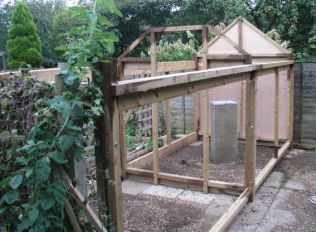 |
The finished framework.
7th September 2009
|
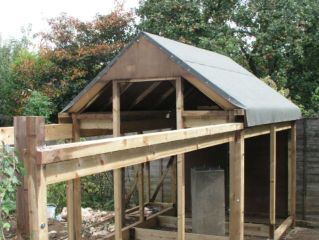 |
The roof.
17th September 2009
|
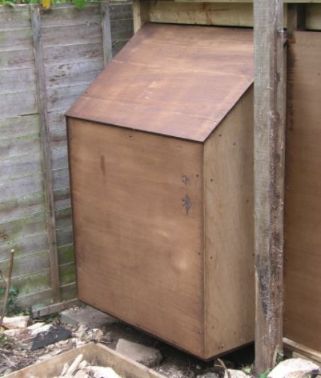 |
There is a little extra space where the old apple tree was that I decided I could use for an external cupboard. The grey post used to hold the old tressis fence, which I have removed, but the post is sound so we will use it again.
28th September 2009
|
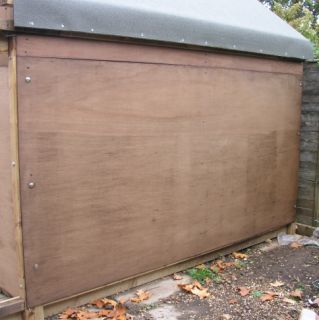 |
The cladding is 6-mm ply. This side takes a whole sheet plus a bit.
No window.
1st October 2009
|
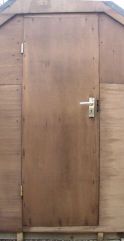 |
The door.
10th October 2009
|
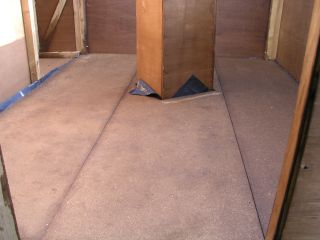 |
The floor is made from tongued and grooved chipboard.
13th October 2009
|
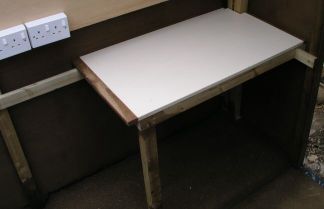 |
Here I describe how I made a table and put a shelf in the cupboard.
18th October 2009
|
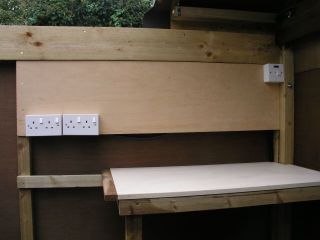 |
I have run in mains electricity from a nearby outlet.
19th October 2009
|
 |
I have mounted the telescope.
23rd October 2009
|
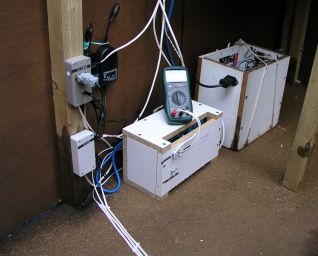 |
The low-voltage electrics.
20th November 2009
|
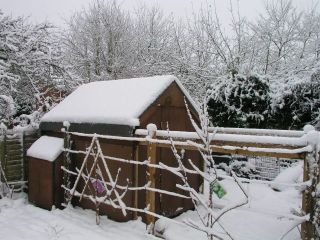 |
The completed Observatory in the snow.
22nd December 2009
|
 |
A few views from my Observatory.
17th October 2009
|
 |
Alterations and additions I have made as a result of using my observatory.
4th June 2010 ff
|
