
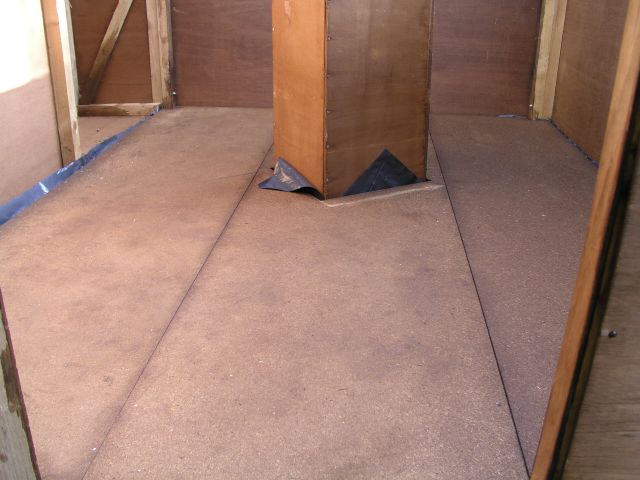
 Three of the walls have a gravel board on the inside at ground level. I added three more across the structure, held at each end by short lengths of 47×50 mm timber. The floor is supported by these six gravel boards and the frame of the fourth wall. The floor consists of three lengths of tongued and grooved, chipboard flooring. This is not external quality but is simple and strong so, as well as treating it liberally with Cuprinol, I decided to put a layer of polythene under it as a damp-proof membrane. This had to be cut around the pillar and you can see it in the picture coming up between the pillar and the floor. I was determined that the floor should not touch the pillar at any point so that any vibration from the floor would not transmit to the pillar. However this leaves a gap down which I was bound to drop all sorts of valuable things. (I've lost count of how many wing nuts are buried in my lawn.) My first thought was to pull the polythene through the gap and fix it to the pillar. I tacked it temporally with roofing tacks whilst I laid the floor. When I removed the first one, I dropped it down the gap and it disappeared under the floor, so for ever there will be a tack between the floor and the polythene. The idea wasn't going to work. I shall find a way to secure a flexible sheet between the pillar and the top of the floor; (I may use bits of pond liner left over from building a pond a few years ago as it is much stronger than polythene). I may eventually revert to my original idea and put down carpet.
Although the pillar is not in the centre of the observatory (it is displaced slightly to the south), the hole for the pillar fell into a single sheet. I cut the hole the hard way, but of course the short joins were not nearly strong enough to support the board and snapped at the first opportunity. It is of no consequence as the board is supported by the tongues of the adjacent boards.
The tongue and groove structure means that the boards are slid sideways into their final position. I had to allow for this when cutting the hole and the third board. I see no reason to fix the floor down, but it is necessary to prevent them moving back and releasing the tongues. I've added small wedges where the third board fits around the frame verticals.
13th October 2009
In the end this is how I sealed the gap between the pillar and the floor. The black material is pond liner and it is stuck to the pillar with contact adhesive and sticky tape, and the corners are fixed to the floor with roofing tacks. In real life it looks worse than it does in the picture and I am thinking of finding some broard tape to cover over the sticky tape. (It did occur to me that what I need is a miniskirt made for a girl with a 56-inch waist—size 36!) It is functional as it is and that is all that really matters.