
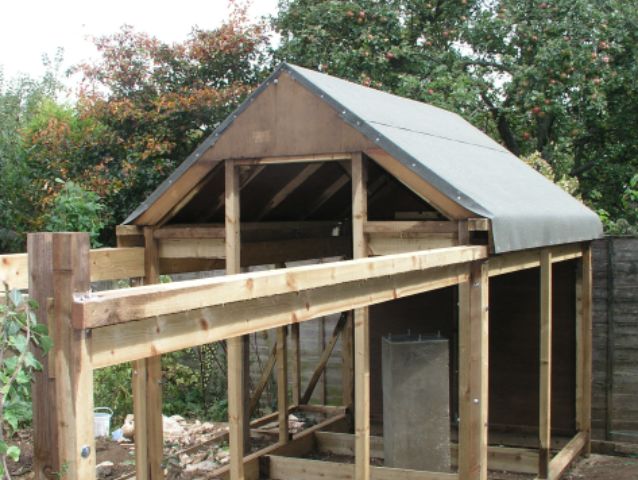
Each roof truss is made of two lengths of 47×22 timber braced with triangles of 12-mm ply, all carefully adjusted so that the distance across the base was the same for each one to within a millimetre or two. The assembly was bolted together using coach bolts as I felt that would make for a stronger joint. Each assembly is screwed to the runners with a single screw each side. At first I feared this might not be enough, but when the boarding was added the whole roof became very rigid and is held to the runners with ten screws and the timber of the runners is very solid.
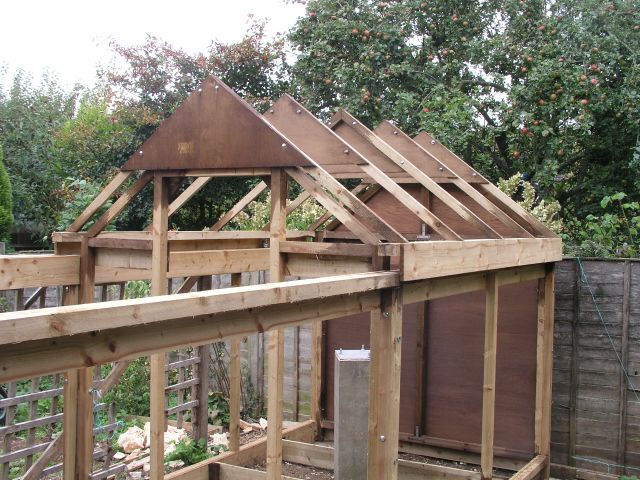
The truss nearest the camera is slightly different. The ply-wood brace is larger than the others and will not pass over the door frame. It will overlap the cladding on this wall ensuring that any rain water does not enter the observatory. I cannot weather-proof the other end in the same way and I will describe how I've done that when I've worked out how to do it
(Don't ask why the central brace is the other way round compared with the othersŚI've no idea.)
17th September 2009
Just to prove that it does roll off.
17th September 2009
I want the roof to be locked down to the frame when it is closed. I don't want to wake up one morning to find the roof next door. This is my bright idea to lock it down automatically. I have put two bolts through the end timbers which slot into holes drilled in the ends of the runners. It also prevents the roof spreading under load. Drilling these holes in exactly the right place proved tricky so I made holes much too big and filled them with epoxy putty; then I closed the roof, driving the bolts into the putty, opened the roof again and left it 24 hours for the putty to set. Now I have holes in exactly the right place.
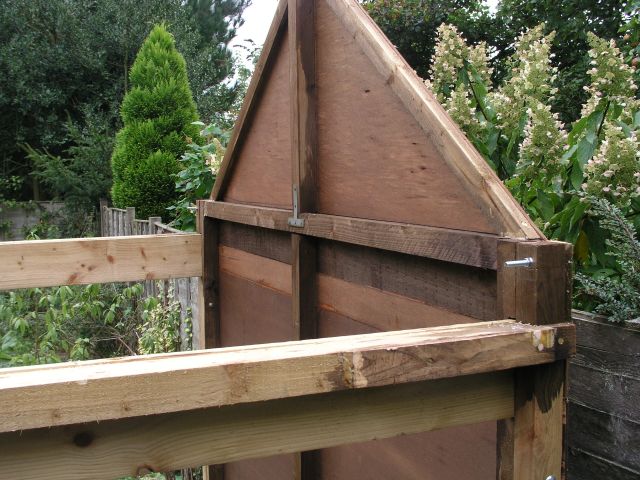
The other end is secured by two bolts fitted to the end wall and engaging with wooden blocks screwed to the runners. These not only hold the roof down to the building, but also prevent the roof from being rolled off from the outside.
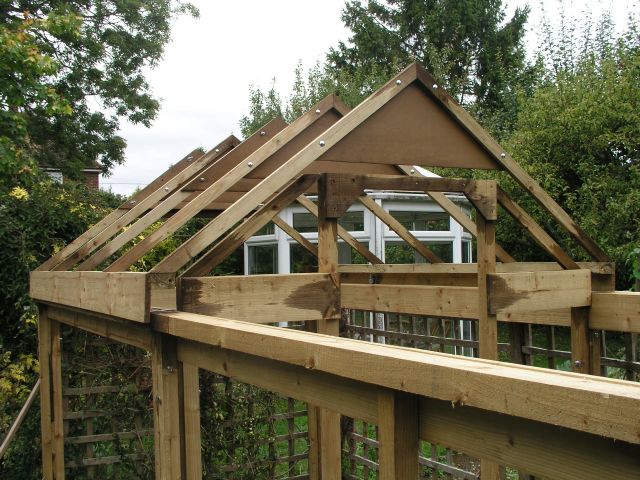
The roof boards are in place. These are each a complete sheet of 9-mm ply, held down with five screws into each truss. The sheets should meet cleanly at the top, but nothing is perfect. I shall cover the whole roof eventually with roofing felt. The timbers at this end do not pass over the end wall, so press against the wall and seal it from the rain. This trick doesn't work at the far end, so there I have arranged that the roof clears the wall by only a few millimetres and overhangs by enough that I think it unlikely the rain will get in. (I cannot photograph this without going next door and my neighbour is being rather miserable about this construction.)
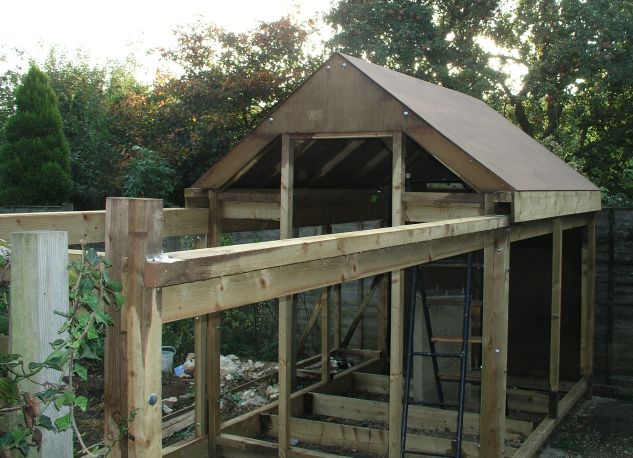
The roof is now very rigid and rolls off very easily. I can reach both sides but I can also push it using the ply triangles overhead.
17th September 2009
The roofing felt is on and so apart from a few details to seal the runners against the rain, and the provision of extra security to the attachment of the rafters to the runners, the roof is complete
24th September 2009
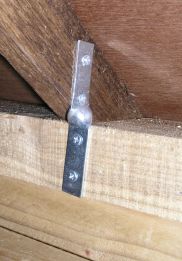
I was somewhat unhappy about the attachment of the rafters to the runners which involves a single screw at each side. Members of the LX200 Yahoo group from America (where they are more concerned by hurricanes than we are in the UK) expressed the same concern and suggested the addition of hurricane ties. I have been unable to find these in the UK, so had to make something similar myself. To see the saga of the hurricane ties, click on the picture.
25th September 2009
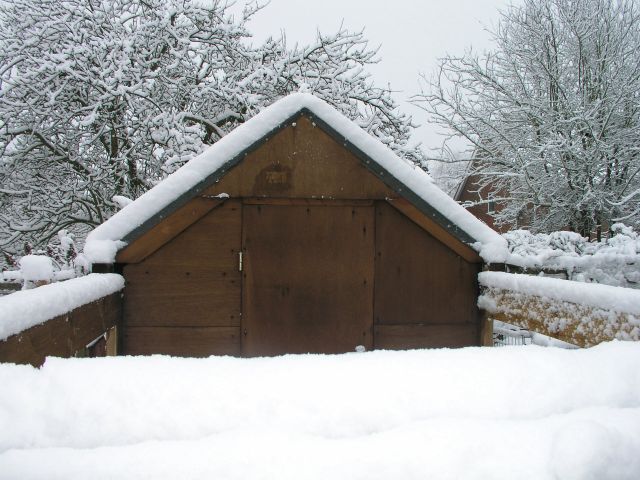
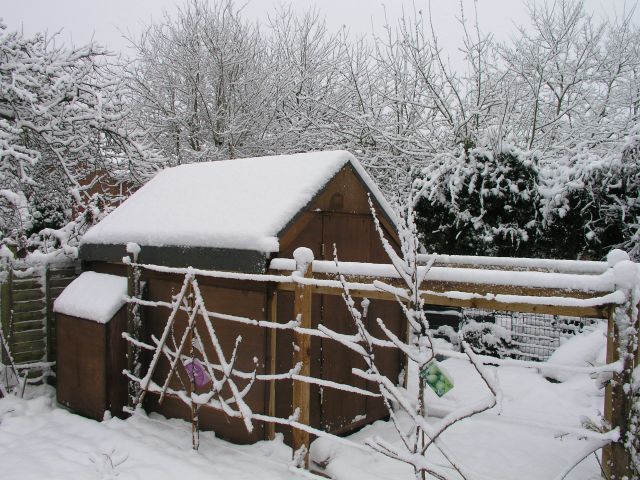
The first load test for the roof. There is approximately 100 mm of snow and a simple test with a cylinder indicated that this is the equivalent of 18 mm of water. The roof is 2440×2440 mm overall, so the volume of water is about 107 litres, so the total load is about 100 kilograms. It may not be obvious from the picture, because the snow has blocked the ventilation holes, but the roof has not spread at all. (I can tell this because there are blocks on the runners where the bolts engage that are a close fit to the end wall, and these were as close as they ever were.) Before opening the roof, I cleared a few centimetres of the far end of the roof to ensure that snow did not drop off as the roof slid open, and I cleared the external rails. The roof was more difficult to open but opened just the same. I did have a slight problem the first night after a slight thaw during the day when one side would not move. What I think had happened was that melt water had refrozen between the top of the wall and the guide boards on the roof runners. I went along easing it away with a spanner and the roof rolled off as usual. It is possible we will get more snow than this at some time, but it will be quite unlikely here.
(I should add that the snow in the foreground is not on the ground against the door, but is on the end rail.)
22nd December 2009