We moved to a smaller house in the north of England and there was some money left over. My wife is a keen gardener, so she gets a makeover of the garden and I get a new observatory. Our old garden was much too big; the new one is much smaller but still a good size in this locality, a 13-year old housing estate on the northern edge of the town.
|
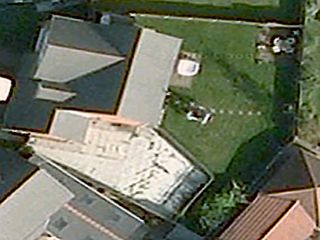
This is an aerial view of our new garden as it was when we bought it. The site for the observatory is in the north-east corner where there was a gravelled area with a metal structure. It is too close to the house on its west and a neighbour's house to the north-east, but it was the best we could do.
This picture has north at the top.
6th June 2014
|

|
We found a local builder to build a small extension to the house and to landscape the garden, so I asked him if he could build an observatory. He was so enthusiastic about it and has so many good ideas that I decided to let him do it. Significantly more expensive than buying one, but it is going to look much better, blend into the garden much better, and I can have exactly what I want. Much of the design and outward appearance are thanks to him.
There is nothing to add to this so the picture is not a link.
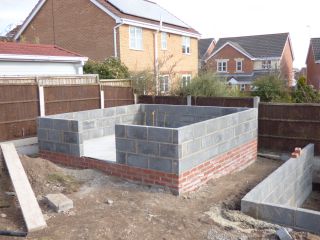
The foundations are in and bricked to what will be floor level.
25th February 2015
|
|
The damp-proof membrane is in, the floor is laid and the outer wall is being built.
In this picture you can see the nearest neighbouring house which will restrict my views to the north east.
6th March 2015
|
|
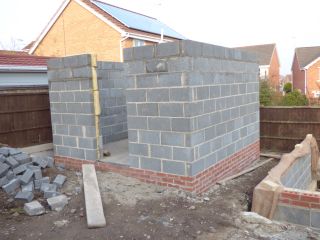
The walls are complete. As you can see, I elected to have insulated cavity walls, and I asked that the door be high enough for me to walk through without ducking.
13th March 2015
|
|
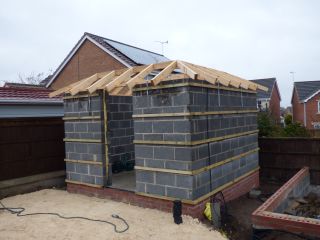
The basic construction of the roof is complete. Move your mouse over the image to see a view from above.
Battens have been fixed to the walls and these will hold the cladding.
We are ready for the dome
26th March 2015
|
This is an attempt to show a panoramic view of my surroundings from the height of the observatory roof
5th April 2015
|

|
|
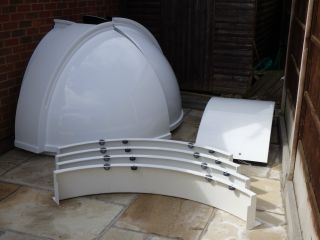
The dome has arrived from Pulsar. This is how it arrived, the dome itself was in four sections, as is the ring on which it rides (Pulsar call this a "short wall"). In addition there was a box containing all the hardware needed to bolt it all together and the sealant to seal the joins. Also in the box was the drive motor that rotates the dome (an optional extra).
14th April 2015
|

|
The dome has been assembled and placed on the roof.
21st April 2015
|

|
The cladding has been put on the walls. It is western red cedar and looks terrific. My builder is also an expert in cladding, and this is his design.
Note the little gate they made from some spare cladding.
6th May 2015
|
|
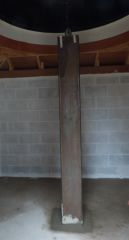
The pillar has been set in place.
8th May 2015
|
|
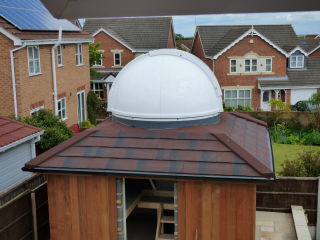
The roof is complete.
20th May 2015
|

|
The interior fittings.
20th May 2015
|

|
The Observatory is operational.
Here is my 10-inch LX200 on the iOptron iEQ45 Pro mount seen from the doorway. The red glow on the dome is real and results from light leaking through the dome, which is fibreglass coated white on the outside and painted black on the inside. I assume infrared comes through too, which is a pity as I don't have the ventilation I wanted, and the interior does get quite warm when the Sun is shining.
The strings going up to the top of the dome are the cords that open and close the shutter.
Note how the two 2-kg weights have had to be put right out on an extended balance shaft in order to balance the heavy LX200 and some additional weight, such as the camera.
12th June 2015
|
|
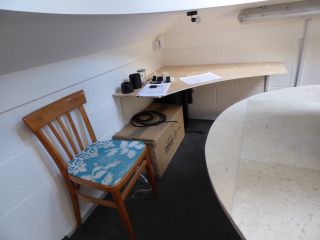
Internal Additions.
As I use the observatory a number of improvements I could make become evident. I've put soft flooring down to protect dropped filters; I've added a shelf to help me keep the desk clear; and added some furniture. I've also fitted the home-made desk lamp that I had in my last observatory on the north-east corner of the desk.
21st October 2015
|
|
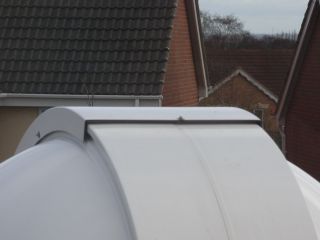
The Dome Leaks.
Sadly rain has penetrated my dome. It came in under the top of the shutter shown here. Although this may have been as a result of unfortunate circumstances (rain and strong wind in just the wrong direction), I have tried to mitigate the problem which I describe on this page.
4th February 2016
|
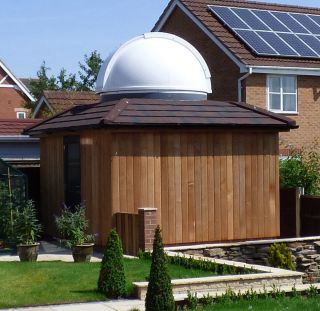
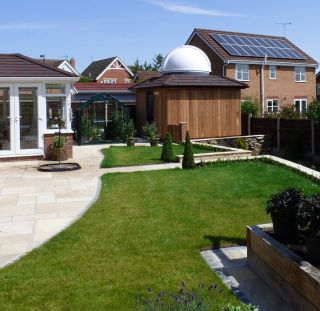
Finally two pictures of the observatory in its context in our garden.