After several years of using my Meade12" ACF, I eventually decided to change to the Teleskop Service version of the 10" Guan Sheng Optical (GSO) Ritchey-Chrétien Truss Tube telescope. The GSO range of RC telescopes is very competitively priced compared to offerings of some years ago from American manufacturers and they have gained a solid reputation in all their configurations.
I decided to 'upgrade' partly because I hoped the lighter instrument would ride on my EQ6 mount, partly because the seeing conditions here rarely allowed me to make full use of the 3 metre focal length of the Meade, and particularly because of a focuser upgrade which offered a very strong focuser modified to improve collimation and which was expected easily to carry my heavy camera assembly which had always been marginal with the Moonlite focuser on my Meade. ( And to sweeten it even more, the upgrade was reduced as a special offer at the time!)
But the first delivery of the telescope in August 2014 was disastrous - it had been mishandled in transit and the mirror assembly was completely detached and banging about in the frame, resulting in severe scratching to the housing and the mirror itself loose in its cell.
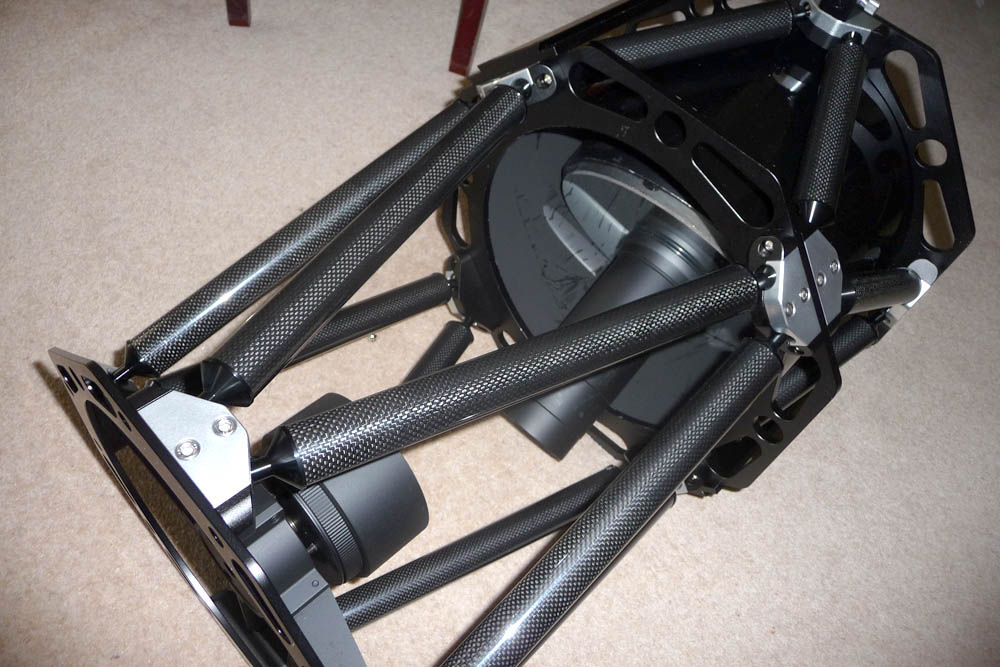
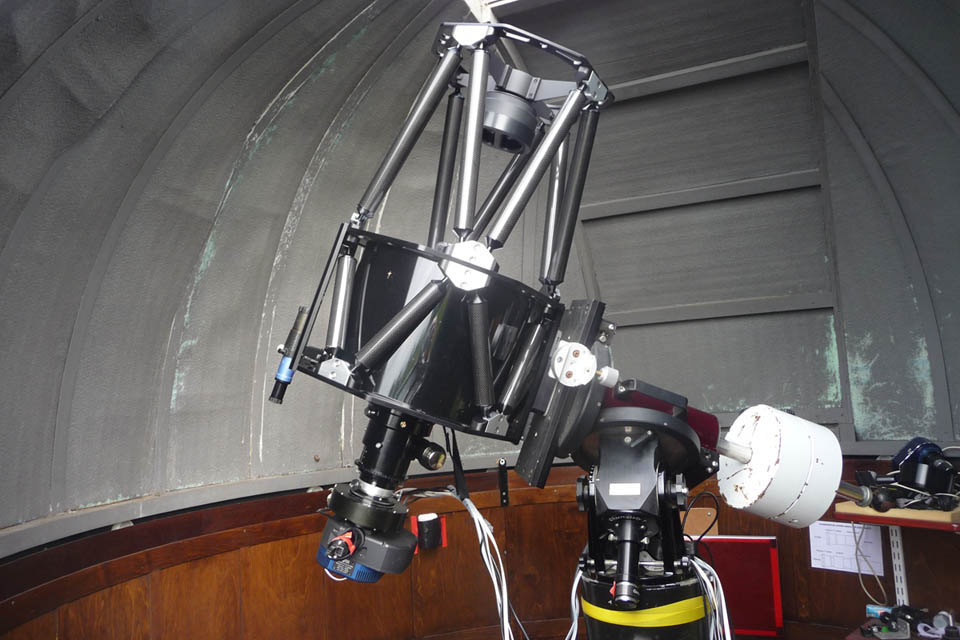
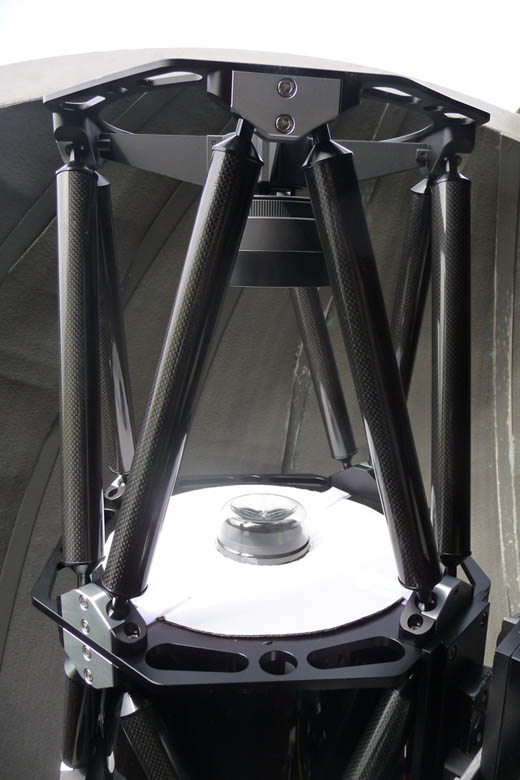
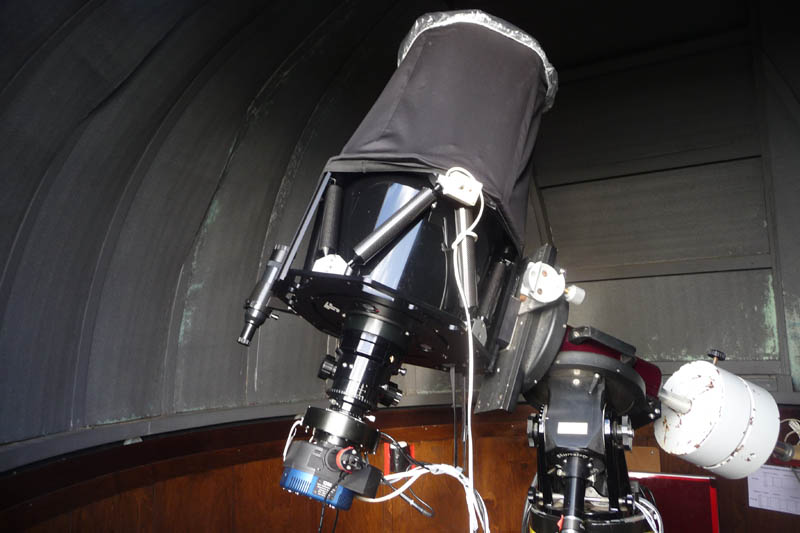
A replacement duly arrived in September in excellent condition, thank you TS, and after tweaking the collimation proved to be living up to expectations in all respects. Here it is installed in my Observatory. The telescope is beautifully engineered and the Serrurier truss framework is extremely rigid which bodes well for it holding collimation over long periods and when travelling. The substantial 3" focuser as detailed on the Teleskop Service Web Site holds my heavy camera assembly with ease and the fine focus adjustment works smoothly and effectively even with the heavy load.
First light was very successful and I'm looking forward to many years of enjoying this good instrument.
The telescope came packed with a cover for the secondary mirror, but none for the primary. So I 'cobbled up' a temporary cover (which may be semi-permanent!) from cardboard (already gloss white on one side) and a plastic bottle base, fixed to the front of the primary housing with hook and loop tape. I may eventually fit a shroud to minimise external light interference, then a dust cap over the front will take the place of the mirror covers. Both covers of course - I don't want the secondary cap to fall off and mark the primary mirror!
Later As a result of the wetting (see the mirror cleaning page) the cardboard cover also got wet and distorted, so was replaced with hardboard and a foam rubber strip around the edge. Not a seal as such, but with the telescope facing up it sits nicely on the frame and does a satisfactory job.
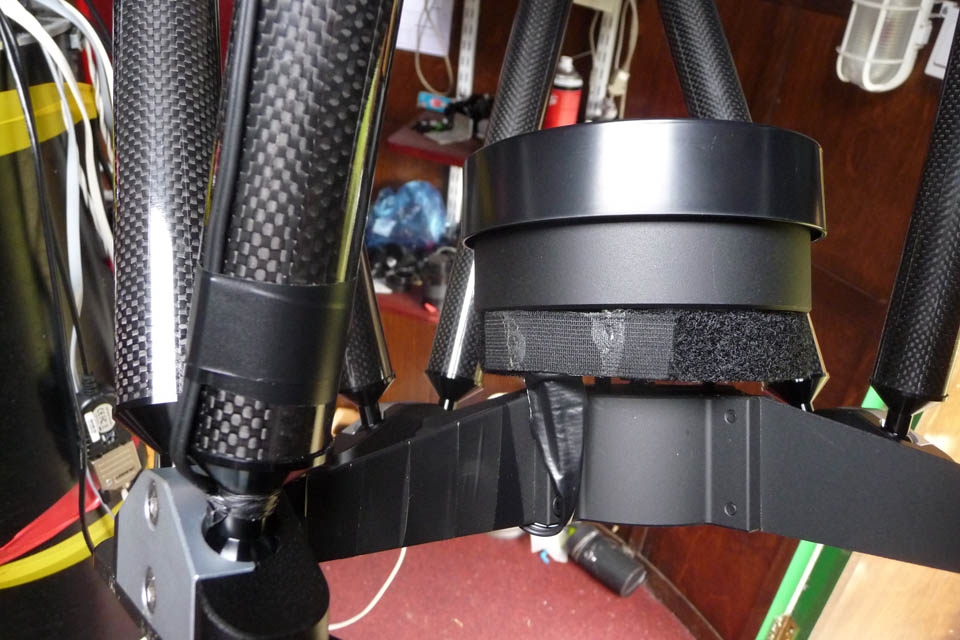
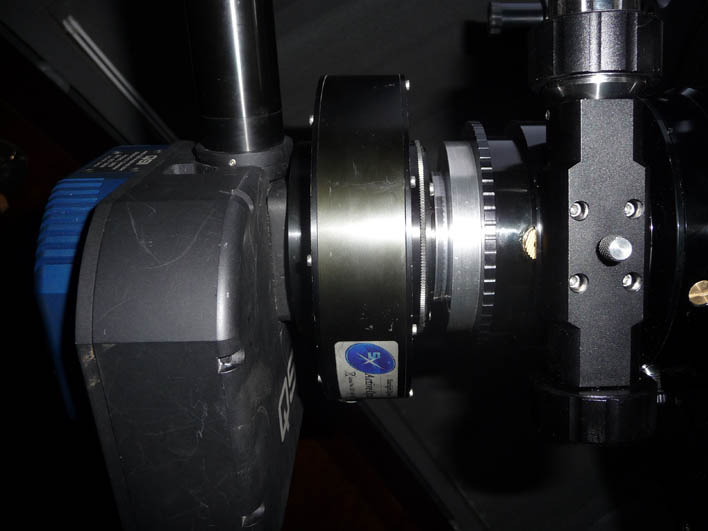
The shape of the secondary mirror holder was such that I was able to fit a home made resistor ladder dew heater to the front of the holder without impinging on the light path. The thin power supply wires are taped to one of the secondary spider arms and make a negligible difference to the diffraction spikes.
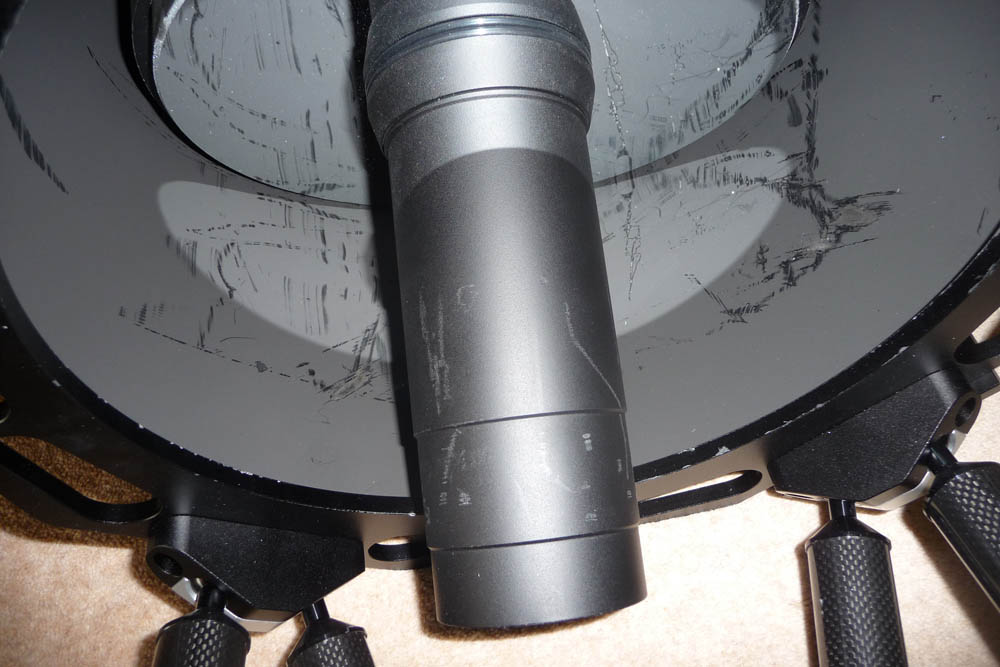
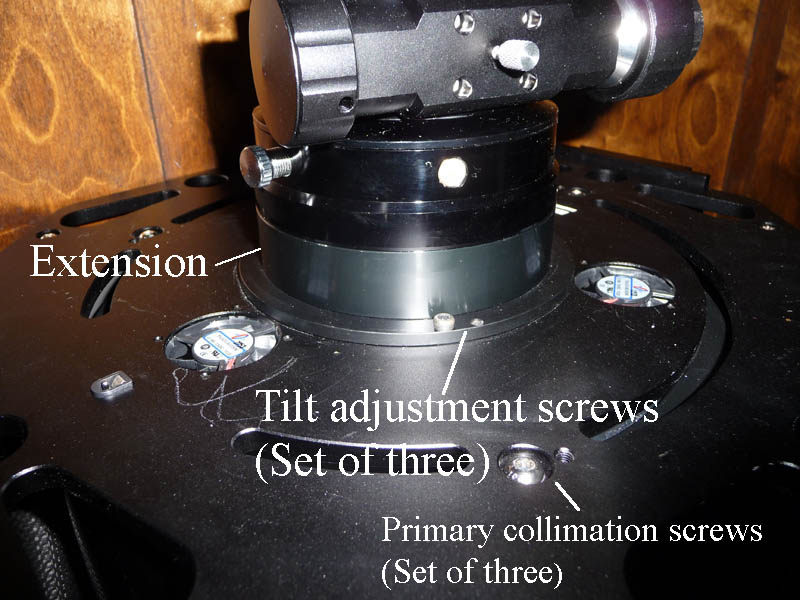
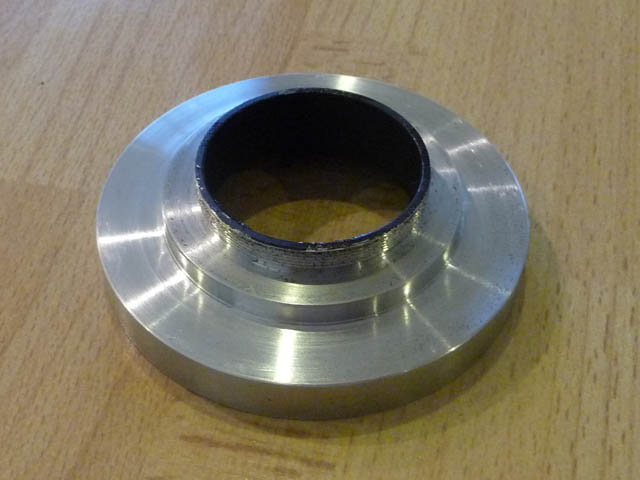
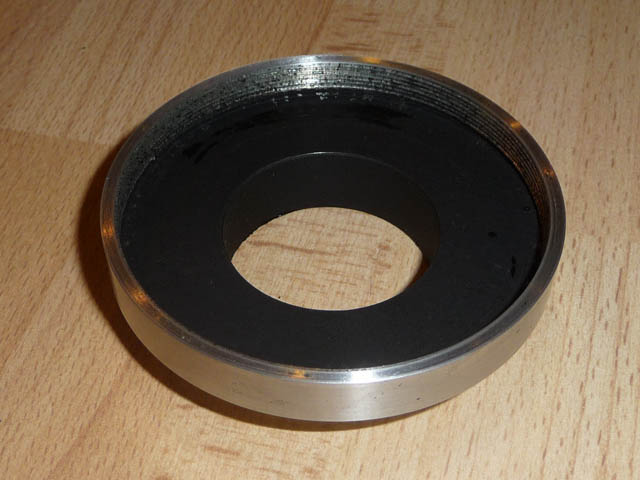
The telescope has quite a long back focus to accommodate cameras etc. and extension pieces are recommended, fitted between the telescope and the focuser to minimise the amount of focuser drawtube overhang. I originally ordered a 50mm extension, but because of the additional length of the focuser modification compared to the original, this proved too much. I managed with existing adapters at the camera end for the initial images, but was able to exchange the 50mm for a 25 mm. This duly arrived on 3rd October and proved to be just the ticket - my full camera arrangement and 2 inch eyepieces with diagonal all nicely come to focus within the relatively limited 45 mm range of the focuser. (Where did those scratches come from? I hadn't noticed them, but they are clearly visible in the flash photo!)
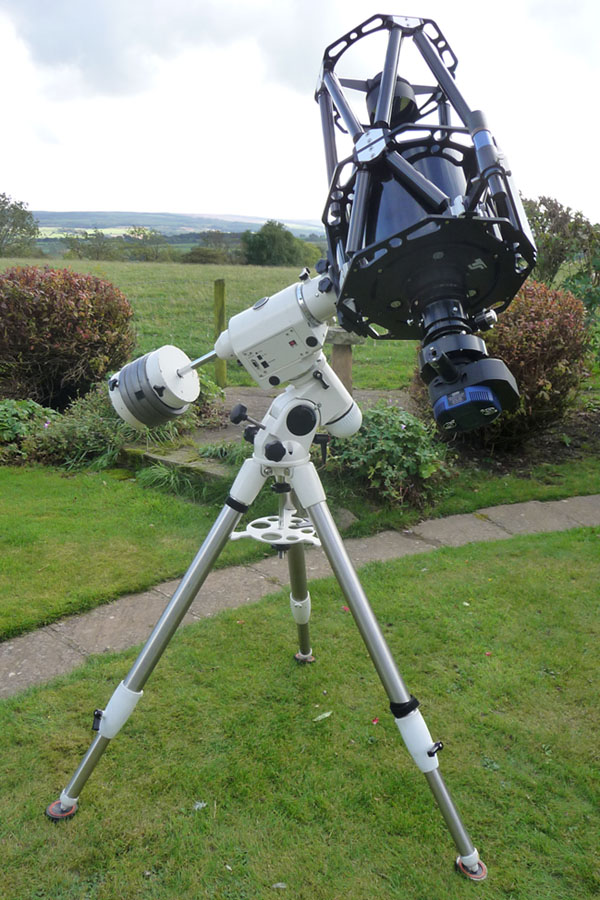
As I mention above, I hoped to be able to use the RC on my EQ6 mount. Although advertised lighter than its Meade 12" LX200 predecessor, by the time I added the 3" focuser and my heavy camera assembly, the weight had crept up quite a bit. So as can be seen, substantial addition to the standard balance weights was required.
The best test for stability is to look through an eyepiece and tap the telescope. A 2" diagonal and large eyepiece is a bit lighter than the camera, but not a huge reduction. and sure enough there was a fair bit of bounce, taking several seconds to settle. BUT I remembered I had languishing in a cupboard a set of Celestron foot dampers. Which I dug out and fitted - the round items at the bottom of the tripod legs. A great improvement, vibration damped out in less than 2 seconds. So fine for visual, and very promising for imaging in calm conditions.
Thanks to the skill of my wife with her sewing machine, I now have a shroud. Completed with a shower cap! The cap is clear plastic, so what's the betting next time out I forget to remove it and struggle to focus ;-)
Also a larger finder - 8 x 40 instead of 6 x 30. Bought at the October Kielder star camp - I couldn't resist it!
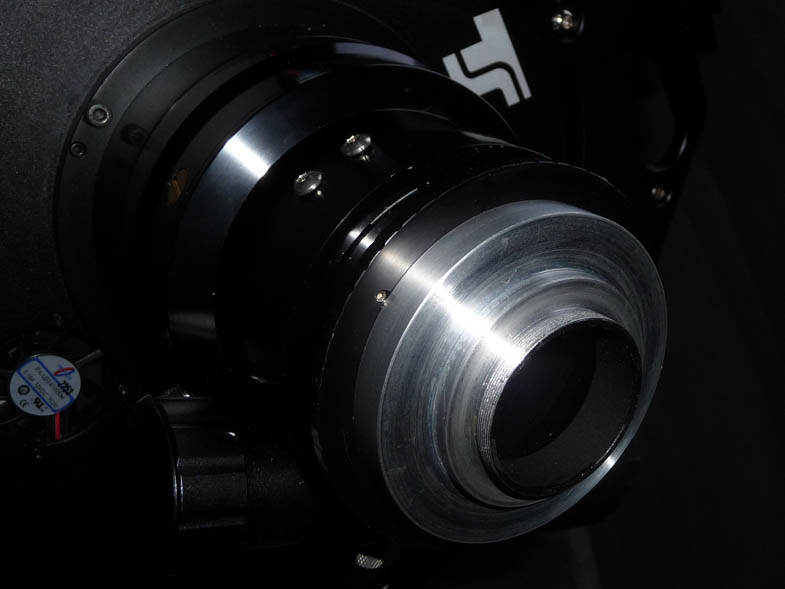
My camera assembly is quite heavy, and because of the modified focuser which allows accurate alignment, it is also sensible to have the camera absolutely square on to the optical axis. With my heavy camera assembly it has always needed particular attention to achieve this with my previous telescope. But this focuser has a detachable clamping unit, which unscrews exposing an M74 x 1 male thread. So in early November 2014 I made an adapter to replace that. It screws onto the focuser and has an M42 x 0.75 T thread for the camera. I don't have an anodising bath, but matt black paint does an excellent job in preventing internal reflections.
Here is the adapter fitted to the focuser, and the complete assembly. Everything snugs up square, and of course there is now no danger of the camera working loose and falling out.
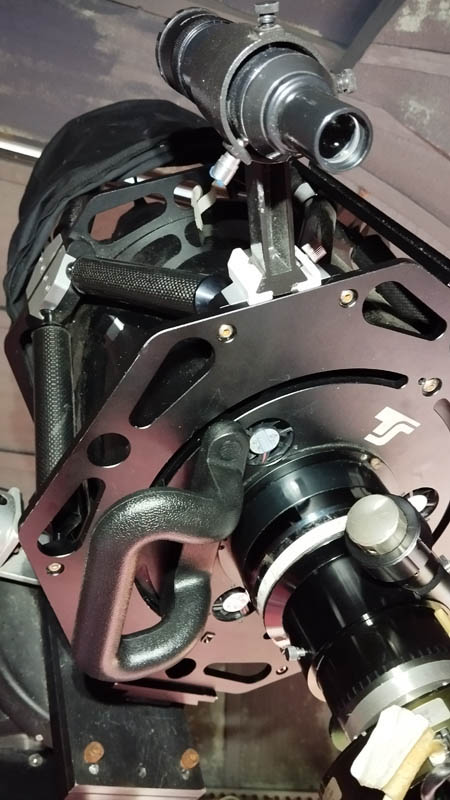
Now February2024 and I'm getting on! I've never been particularly strong, and once I retired the upper body strength I acquired from years of handling stuff as part of my business has mainly deserted me. So as the years progressed I found my telescope increasingly difficult to lift off and particularly lift on to my observatory mount which is quite high on its pier. It's not just the weight, there is plenty to get hold of and the truss tubes at the front are ok, but although the rear plate has lots of slots in it they are quite small and of course have uncomfortable square edges.
But I had a thought, and after some browsing bought this grab handle which I fitted to the back plate. And it has made a considerable difference. Much more comfortable and the shape I chose allows for my grip to move as required when positioning the telescope's dovetail in the mount clamp.
Nevertheless, the telescope was still a real handful for me and I eventually decided to sell it. It departed in October 2025, the buyer drove over from Appleby, inspected it, paid for it on the spot and took it home with him. I was sad to part with it, it had given me excellent service, but time moves on and age is no friend! I may buy a lighter telescope which will have a similar focal length for imaging small objects. We shall see.