After various discussions I became convinced that my alignment was (possibly badly) off, so I decided to bite the bullet and try to get it right.
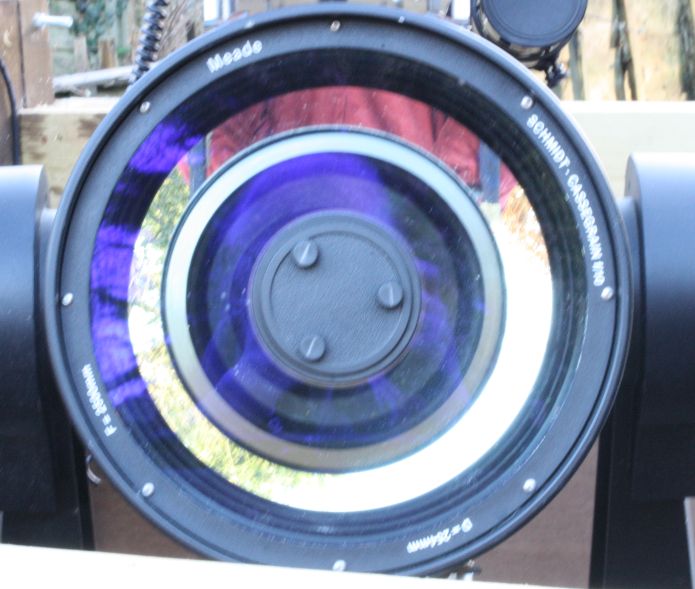
I decided to start with a procedure described (in English) by Bob's Knobs (other languages are available), which involves looking down the wrong end of the telescope. The advantage of this procedure is that it can be done in daylight and is supposed to get it, at least roughly, right. I found the procedure required careful positioning of my eye, which was a lot easier than aligning a camera, so the pictures below may not be quite optimal.

|
This is the picture at the start, the adjustments were as I left them after my studies on Page 2. It looked as though the alignment was way out, so I set about adjusting it to get concentric circles.
|
|
After quite a considerable amount of adjustment I achieved this picture. It looks a lot better.
|
This looked good so that night I tried it out under the stars....
|
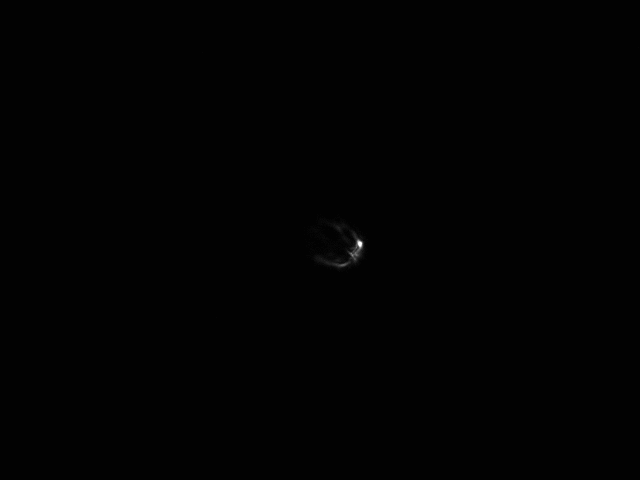
Here an out-of-focus image of the star Mirphak imaged at prime focus. Not as good as I hoped! It looks as though the Bob's Knobs procedure is more approximate than I hoped. I expect it is intended only after replacing the knobs to get it roughly right.
|
|
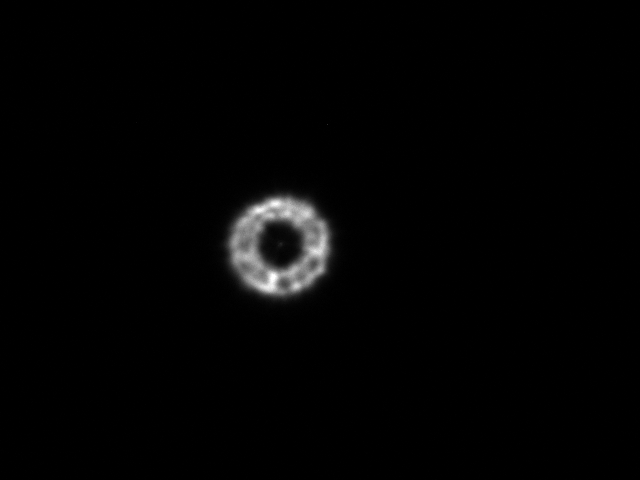
After a lot of adjusting I managed to get this image which at least looks a lot better.
|
|
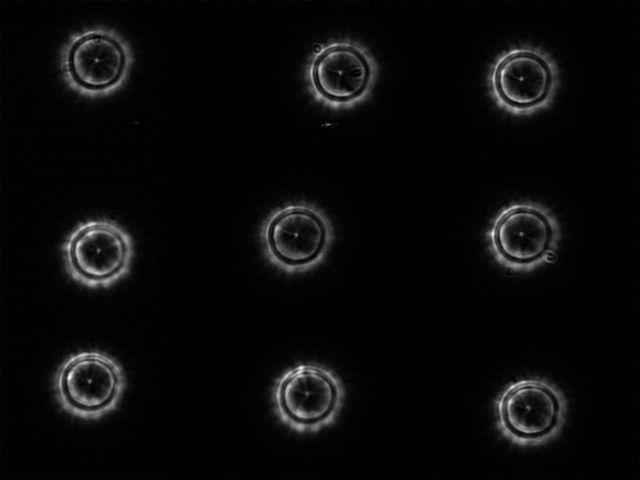
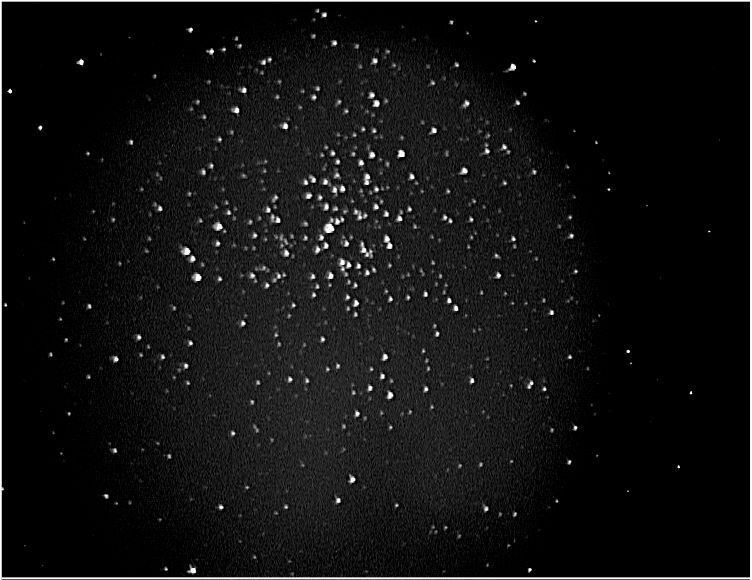
So then I took nine 52-frame avi files with Mirphak in different positions around the frame. I processed these in RegiStax applying a small wavelet enhancement to each and combined the nine in K3CCDTools. Finally I applied a small unsharp-mask enhancement to get this picture. You can see two rings of the Airy pattern which look good at the top of the picture but maybe not quite as good at the bottom. However I was not aware of this until I completed the processing.
|
This all looked pretty good so I fitted the focal reducer and imaged M37 - a suitable open cluster.
|
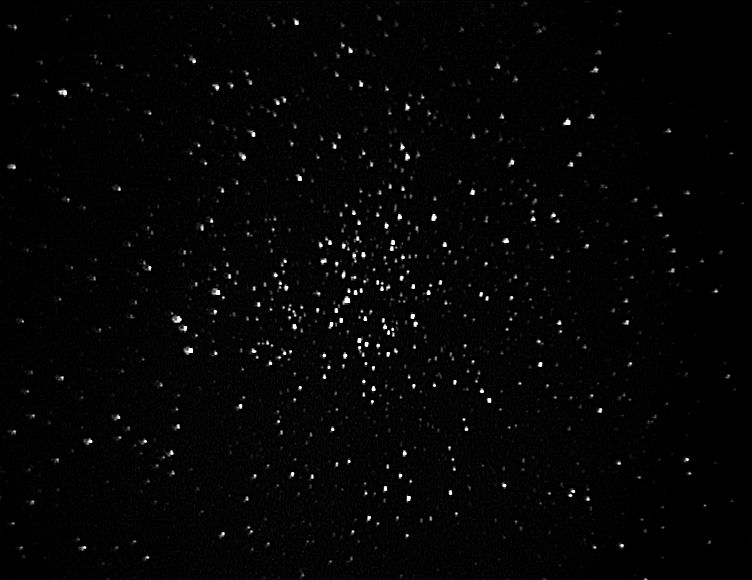
And this is the image I got. I think this is a little better than when I started, but it is not perfect yet.
Now I have to admit that I may be making things more difficult for myself than I might have done. Whenever I image with my MX716, I use a feature in its software that I usually describe as similar to a positive gamma correction. However it is more than that. The software describes it as a "non-linear stretch" but the icon implies that it is a logarithmic transformation. If so, that would make it enhance the contrast in the dark areas of the picture very dramatically, and it certainly brings up faint stars you'd never guess were there. But of cause it also brings up the faint shadow caused by coma. Move the mouse pointer over the image and you will see a picture that does not involve this enhancement but which has been enhanced by cutting the histogram 30 - 120 in RegiStax. (Both images include wavelets 1 and 2 set to 5 without which most of the stars disappear.)
|
Finally I thought I would find out how much difference it makes with different spacers between the focal reducer and the camera. The main snag here is that I have to lose the filter holder; I can still mount a filter, but I would have to dismantle the set up to change the filter, which is an issue if I want to do, for example, an LRGB image.
|
|
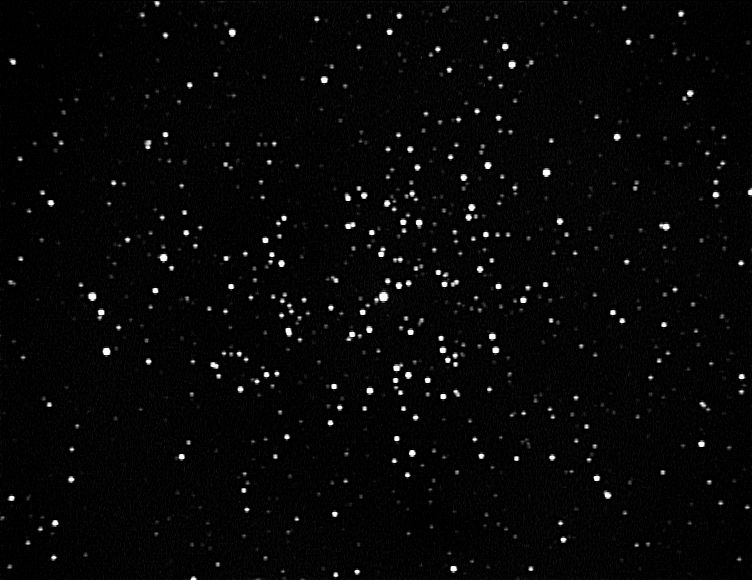
Here is the picture taken with the original set up.
|
|
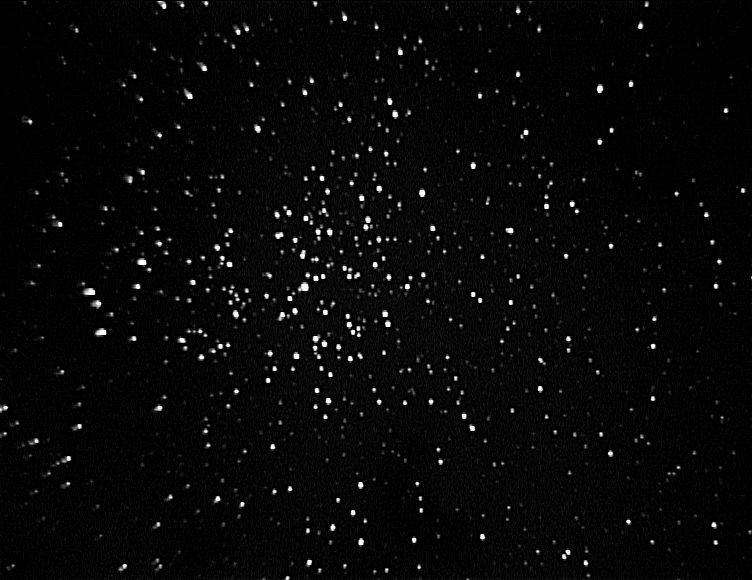
For this picture, I removed the filter holder so that the camera is as close to the lens as possible. The bright star which shows the coma in the picture above, is still in this picture, but shows no coma (that I can see).
|
|
Then I replaced the filter holder with the shorter of the two spacers supplied by Meade with the focal reducer. This spacer is about 9 mm shorter than the filter holder. Coma has returned.
|
|
Then I substituted the longer of the two spacers supplied by Meade with the focal reducer. It is only about 5 mm longer than the filter holder.
Evidently it is too long. The system has caused vignetting (which means that the extremes of the CCD cannot see the whole of the aperture of the telescope). A second feature of the Starlight software, which I always use, sets the background to black. It has set the vignetted part of the image to black, leaving the sky glow in the centre insufficiently corrected.
If the telescope were correctly collimated, would this background haze be central? Would one expect the gradation at the sides of this circular patch be the same all round? I have put a white line around the frame to show that the patch is not central but, I admit, I would have expected it to be over to the right.
Is this trying to tell me something?
|
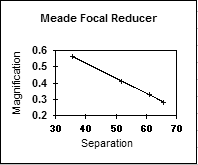
Finally I could use these pictures to measure the magnification of each image. I had previously shown that the original pictures were at a magnification of 0.33 so I used this to calculate the magnification from the separation of a pair of stars. The results were as follows (where separation means the distance of the camera chip from the lens):
| Separation |
Magnification |
| 35.5 | 0.56 |
| 51.7 | 0.41 |
| 61.0 | 0.33 |
| 65.6 | 0.28 |
|
|
And the results fit a straight-line relationship between separation and magnification.
The relationship is
Magnification = 0.89 - 0.0092Separation
|
|
|
    Home     Equipment     Part 1    Part 2    Part 4    Part 5
                           Part 6    Part 7    Part 8    Part 9
