|
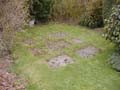
With the Observatory building on order from
Astronomydome, I made a start on the base on 31st. March
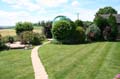
2004. The obvious place for the Observatory was within an
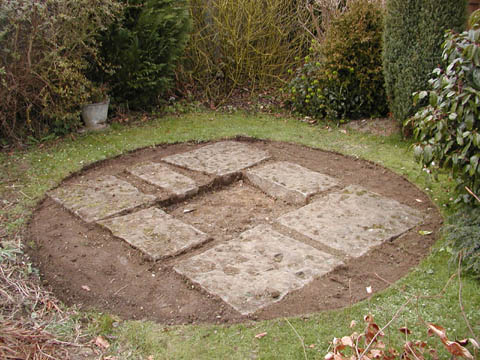
existing circle of shrubs towards the West of the garden.
There were already a number of substantial stone slabs in
the ground , well settled after many years - a good
foundation for the bulk of the 'walk on' slab.
|
|
|
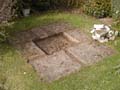
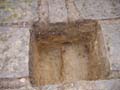
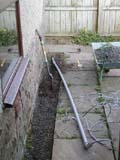
Once the overgrown turf was cleared away the centre slab
was larger than it first seemed, and was VERY heavy! But
judicious application of the heel of a large axe in lieu of
a sledgehammer soon broke up the 4" thick sandstone lump
into manageable pieces. (I later got some flak for that from
a friend who would have given her eyeteeth for the slab.
With hindsight, perhaps I should have lifted and saved all
the slabs. But they did make a very good foundation!) The
perimeter of the hole is now approximately 30" x 36" - a
good size for the block, I just need to go down a bit!
|
|
|
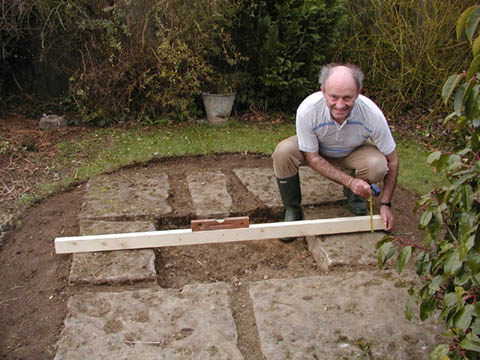
The 8 ft. Observatory dome comes with precast perimeter
blocks and requires an 8' 6" base. So I'm making a 9' base
to give support round the edges.
|

|
|
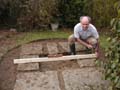
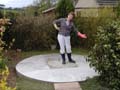
Finally a check on the levels before I start digging!
Apart from a bit of a fall away to the South, the area is
level within about half an inch. I intend to cast the pier
block about 3" above the lip of the stone slabs, with the
circular slab to follow at the same level.
|
|
|
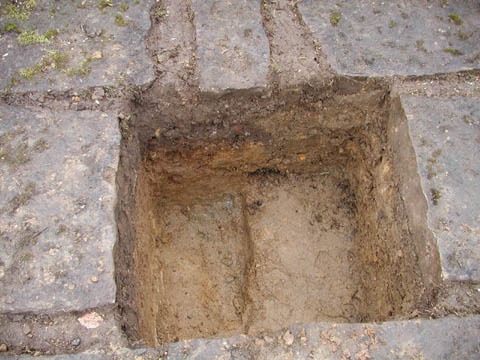
After some hard labour...... A gravel incursion in one
corner - possibly an old soakaway. So I didn't go any deeper
there, but stepped the hole down a bit further at the other
(South ) end. The finished block will be about 32" (0.8 m)
deep at the stepped end, and will weigh approximately 1200
Kg. I think I'll hire a cement mixer!
|
|
|
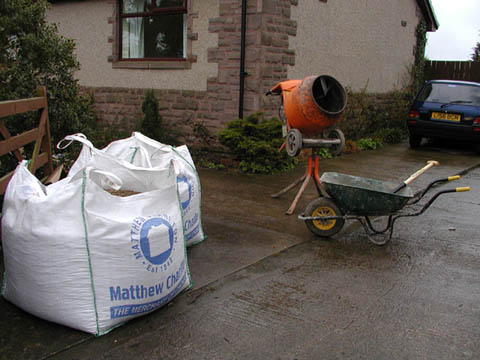
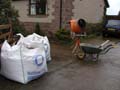
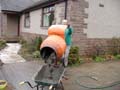
Now I was ready to start on the really hard bit! Easter
weekend was approaching, and the local builder's merchant
had a special offer on - three days equipment hire for the
price of one. Too good to miss! So on Easter Saturday I set
up the hired mixer and barrow, next to the previously
delivered 'dumpy' bags of mixed sand and gravel .
|
|
|
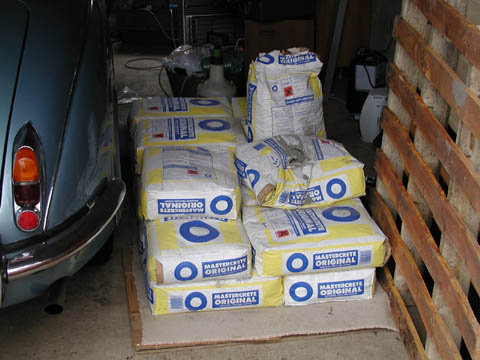
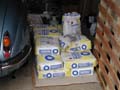
And of course the cement needs to be kept dry. My old
Daimler wasn't too impressed! By the end of the job it
needed a wash!!
|
|
|
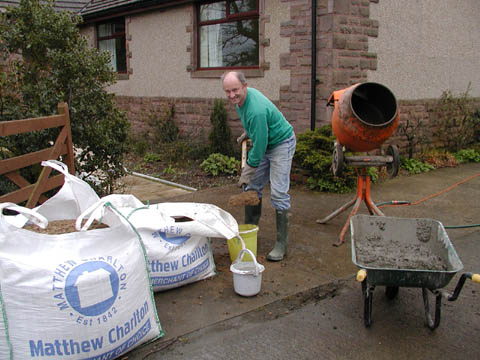
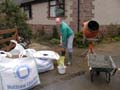
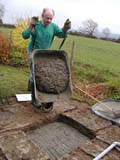
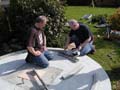
So off we jolly well go! Two large buckets of sand and
gravel to one small one of cement was about right. And start
the next mix off before pouring the previous one - with only
myself working, I had to make the best use of my time!
|
|
|
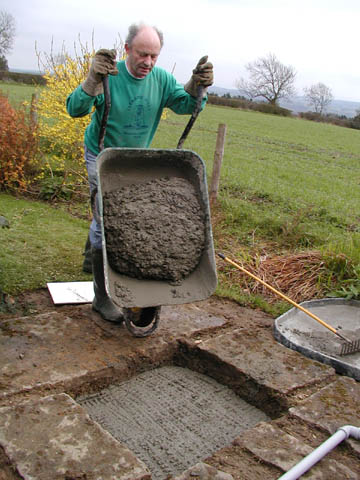
Into the barrow.
|
|
|
And into the hole. Nearly full now!
|
|
|
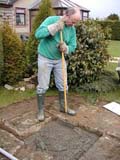
Tamp it down.
|
|
|
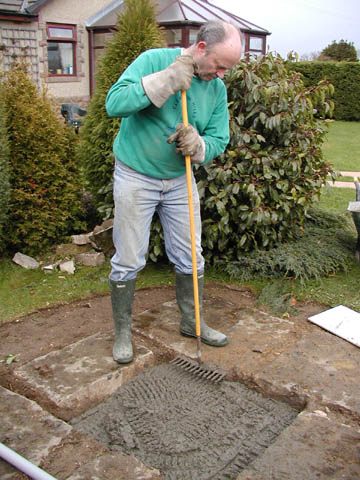
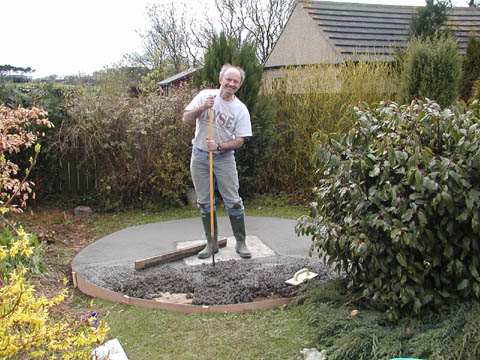
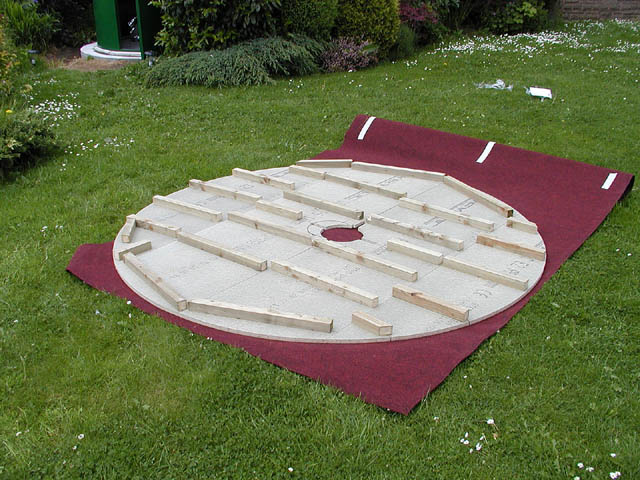
And smooth it off when full to the brim. The excess of
the last mix filled in some of the South side fall away.
Don't forget the pipes to run wiring into the Observatory
and through the slab to the pier!
|
|
|
Leave the block to set for a day (Easter Sunday) then
start again on the Monday. A new meaning to the term 'level
pegging'! I left the blockboard around the centre to help
minimise vibration transmitted from the surrounding
slab.
|

|
|
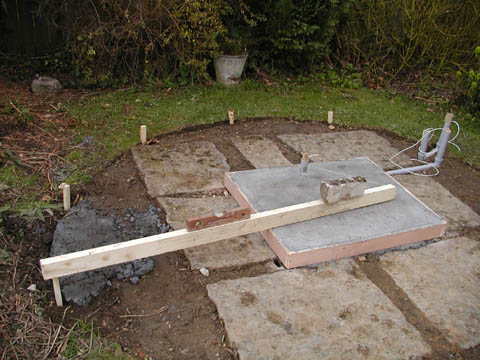
Because of restricted access I had to leave part of the
outer formwork off to get to the rear of the slab.
|
|
|
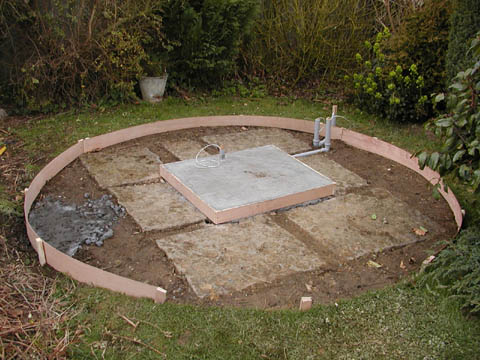
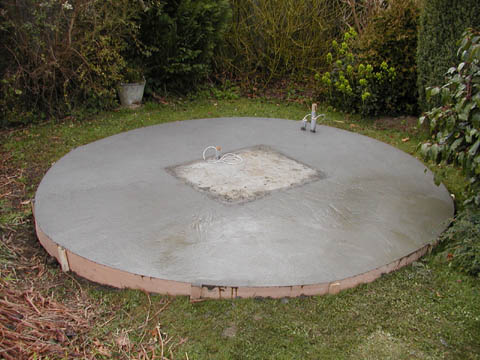
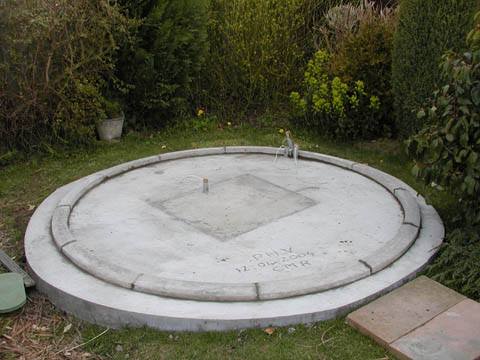
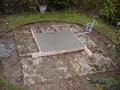
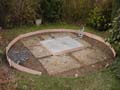
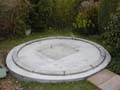
But eventually the work progressed far enough for the
(almost perfect!) circle to be completed. The ground is well
drained and stable, and the slab is over 6" at its thickest,
with support from the existing stone slabs at the 3"
thinnest parts, so I didn't feel there was any need for
reinforcement.
(Fifteen years later there's no sign of movement or
cracking.)
|
|
|
Still Tamping!
|

|
|
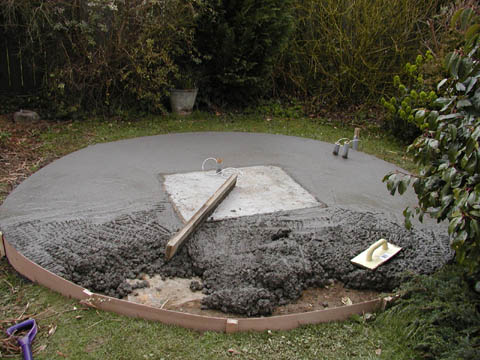
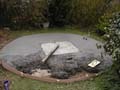
At last the slab was complete. A brief shower puddled on
the surface, but that was soon removed.
|

|
|
And I enjoyed a well earned G & T!
|

|
|
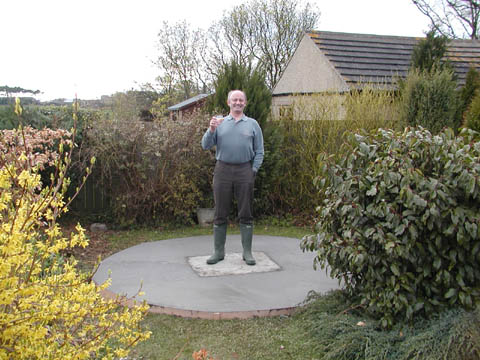
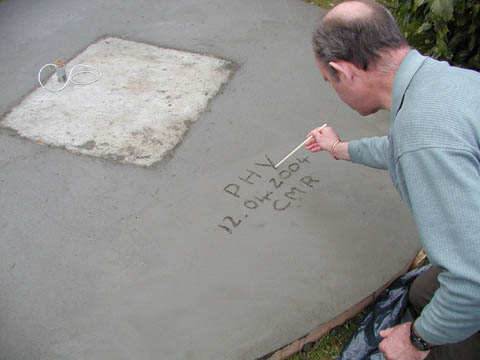
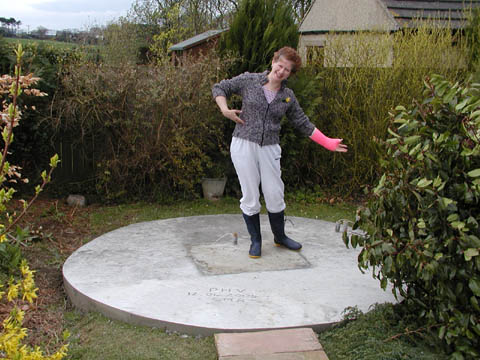
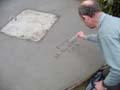
Add the final touches! I'm PHV, CMR was behind the
camera, and provided support and sustenance. She couldn't
safely step over to the centre, so had to wait until the
slab had cured - see later. That's 12th. April of course -
English date convention!
|
|
|
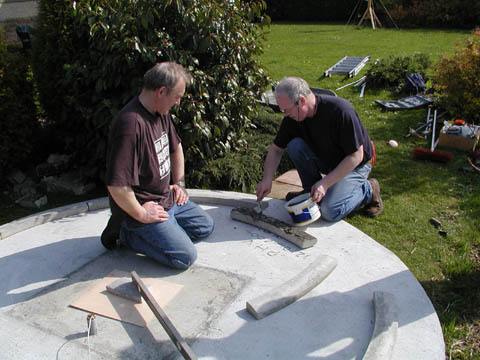
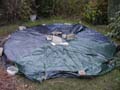
Now leave it to cure for a couple of days!! I was very
fortunate with the weather. After many days of wind and
rain, I had three consecutive days of cool, calm conditions
with only a couple of light showers while I was working.
|
|
|
Here as promised - CMR! The pink monstrosity attached to
Carolyn's left arm is a 'Short Arm Thumb Cast' She allegedly
detached a thumb ligament and sustained a hairline fracture
of her right fibula while skiing in March. I reckon it was
just a ploy to get out of digging and laying concrete! That
was why she couldn't safely step over to the middle block
while the pad was still soft.
Actually the injuries were rotten luck - her first skiing
holiday and she had a bad fall less than half way through
it. But many thanks for the innumerable cups of tea, coffee,
and sandwiches which kept me going.
|
|
|
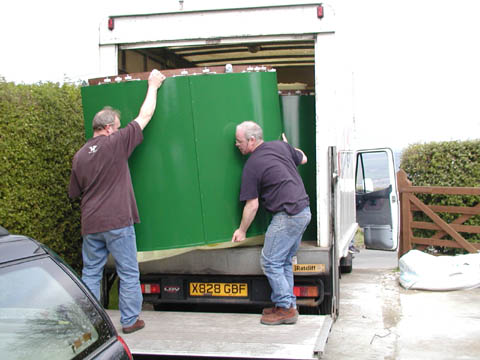
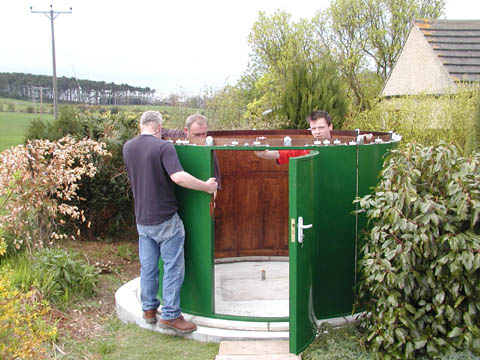
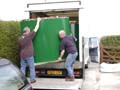
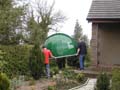
So with the base ready, all I needed was the Dome! And it
duly arrived on 24th. April, complete with erection team.
First job - install the base ring with quick setting
cement.
|
|
|
Done!
|
|
|
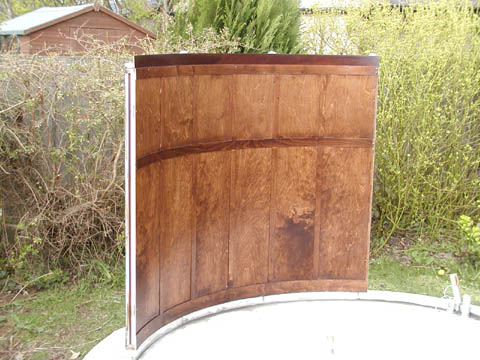
The dome parts were built in a workshop in sections,
completely assembled to check the fit, then disassembled for
transport.
|
|
|
And here's the first section on the base.
|

|
|
All the parts fit together beautifully! John (don't be
shy!), Graham and John's son Alex. What a team!
|

|
|
The side sections were then pulled tightly together,
bottom first, then top as here, and the fixing plates
screwed on.
|

|
|
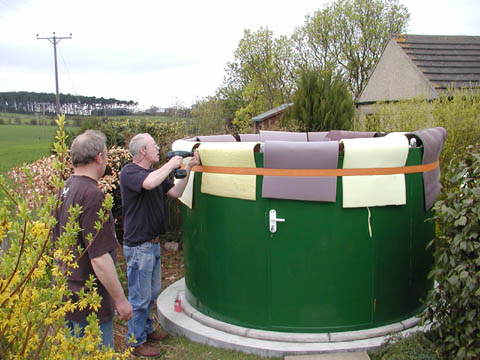
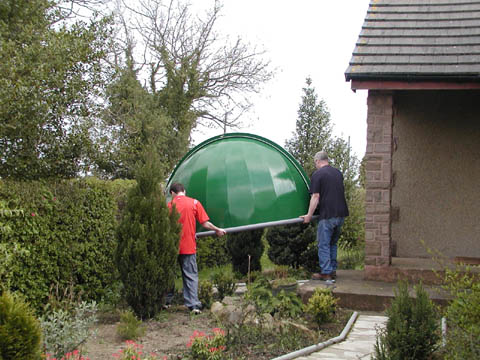
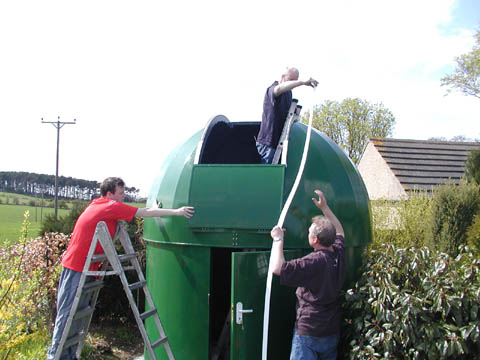
All the larger components had to be carried round the end
of the house. The dome halves needed the full team! Note the
foam protection around the rim. At all times the attention
to detail was absolutely first class.
|
|
|
With the dome halves installed, fit the runners for the
sliding aperture.
|

|
|
And fix the whole thing down to the slab.
|
|
|
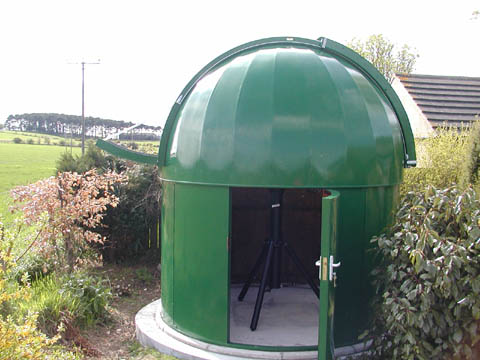
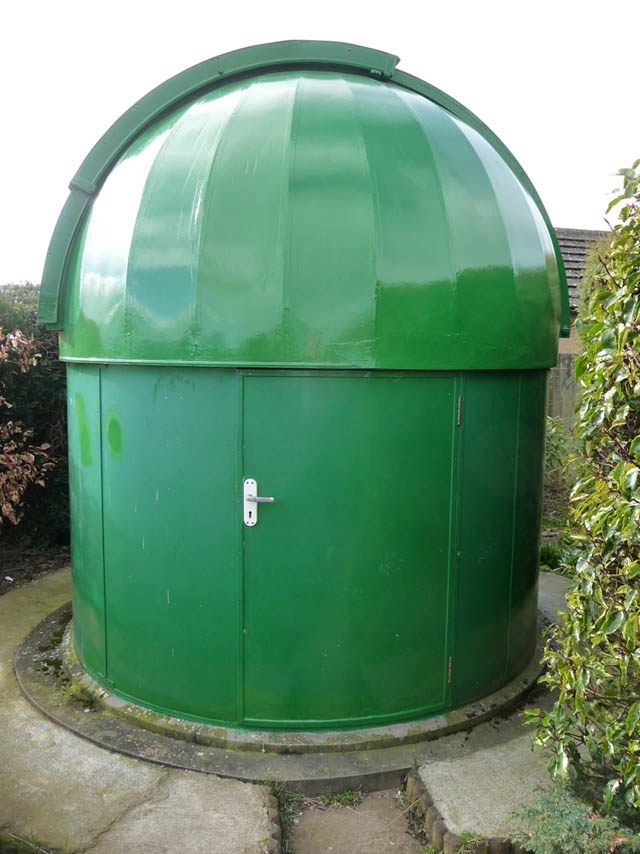
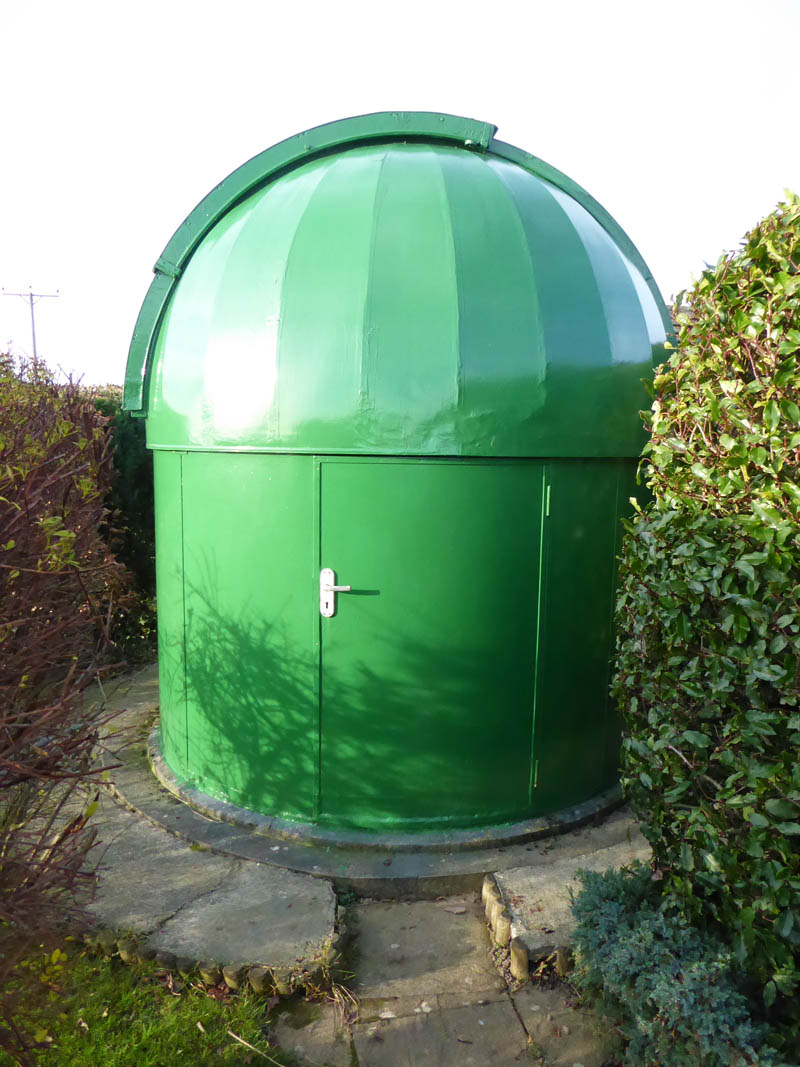
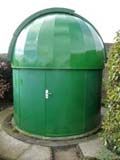
Finished!! Now that the Dome is up I can determine the
height needed for the pier. But for the moment I can observe
with the tripod. Once the pier is installed I can fit a
raised floor and carpeting - keep my tootsies (feet)
warm!
|

|
|
Peace is restored. We were most fortunate in having a
fine calm day for the installation. I can't praise the
workmanship and standard of construction too highly. Quality
with a capital 'Q'. Astronomydome definitely
recommended!
Postscript. Unfortunately a
few years later they ceased trading. Don't know why, but a
pity. The dome is still going strong after 15 years (but see
lower down about some woodwork deterioration.)
|
|
|
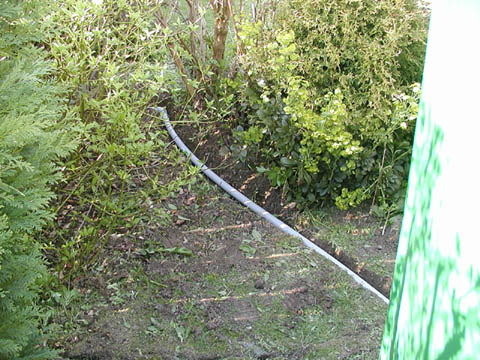
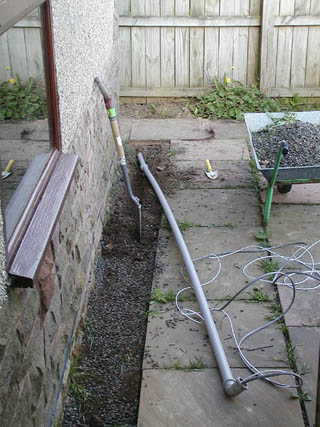
Still more to do! First job, run mains power (and burglar
alarm wire) from the observatory through the shrubbery and
beside a path to the nearest access point. Then with a
holiday approaching and the pier to be constructed, I just
enjoyed observing for a few days. A glitch in the Gemini
controller required a replacement unit, but this duly
arrived from Hungary and all was well again.
|
|
|
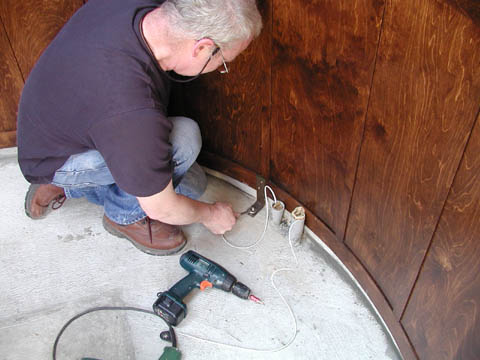
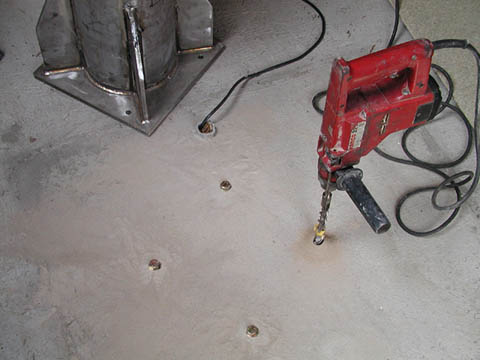
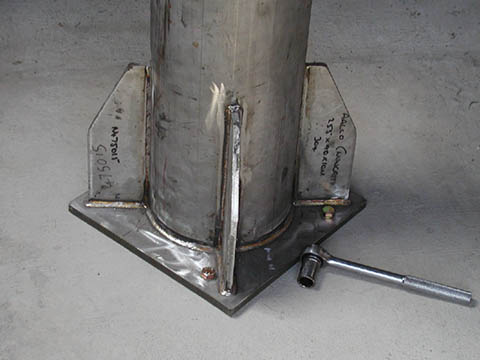
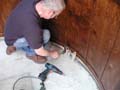
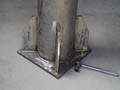
I was away on holiday for a couple of weeks, but meantime
the pier was progressing. Some time ago I had been given
some 8" diameter stainless steel tube. So with a top plate
and base design prepared, the pier was being manufactured
while I was away. Ready for installation on my return, and a
fine job, courtesy of H. Mullins (also sadly ceased trading
in 2016). But it had to be bolted solidly to the block.
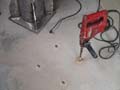
Rawlbolts were used with 12 mm thread size, requiring 20
mm holes in the concrete block. Four holes to match the
holes in the pier base. Anybody who has drilled holes in
concrete will know how tricky it is to get them exactly
centred. So I had to be very careful, as the holes in the
base were 13 mm dia, only allowing for small
discrepancies.
But it fitted first time. Phew!! Then filled with around
150Kg sand and gravel (I had plenty left over from the base
construction) to further increase stability and minimise
vibrations.
|
|
|
A raised carpeted floor is nice to have. Much more
attractive than bare concrete, warmer on the feet and
elevates the viewing position slightly. It's much easier to
fit a carpet when you can lay the floor on top of it!
|

|
|
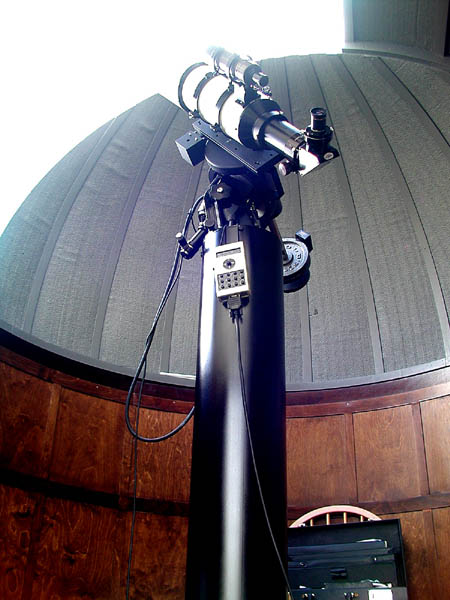
The previous night I aligned the pier top plate with true
North. So with the plate bolted to the pier, the pier
painted, and the floor in place I could finally mount the
Gemini, carrying the TMB tube. When the Maksutov tube
arrives, I intend to mount both together side by side with a
suitable carrying plate.
|

|
|
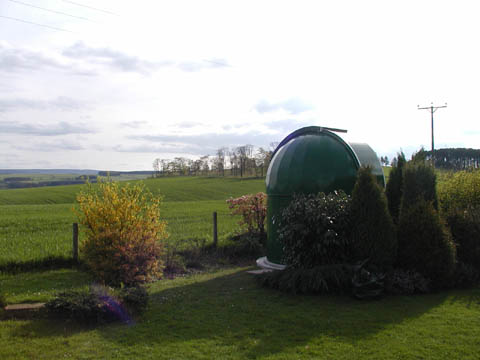
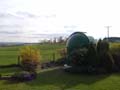
A gravel path around the dome adds the final touch and
improves access for maintenance and shutter operation.
And there it is! 11th. June 2004. A bit over two months
from start to finish. I'm undecided about a fitted table,
but for the most part the labour is over, and now I can
settle down to enjoying the Observatory.
|

|
|
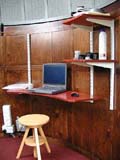
Post Script. 21st. July 2004.
Power points and work space. I finally decided to fit
permanent shelves, one of them as a table, curved to match
the dome wall.
|
|
|
And finally.... (well some things are never
finished.)
Later that Summer I laid a patio at the main garden
entrance from the house (via a Conservatory) and a path to
the Observatory. So I can get from my house to the
Observatory without walking on the grass. And on cold winter
nights, if I'm taking a longish set of images it's easy to
retreat to the warmth of the house!
The following Summer (2005) I also laid slabs on a small
raised area, previously grassed. This makes a nice observing
platform for visiting astronomers to set up their own
telescopes. (Once they move the bird bath!)
|
|
|
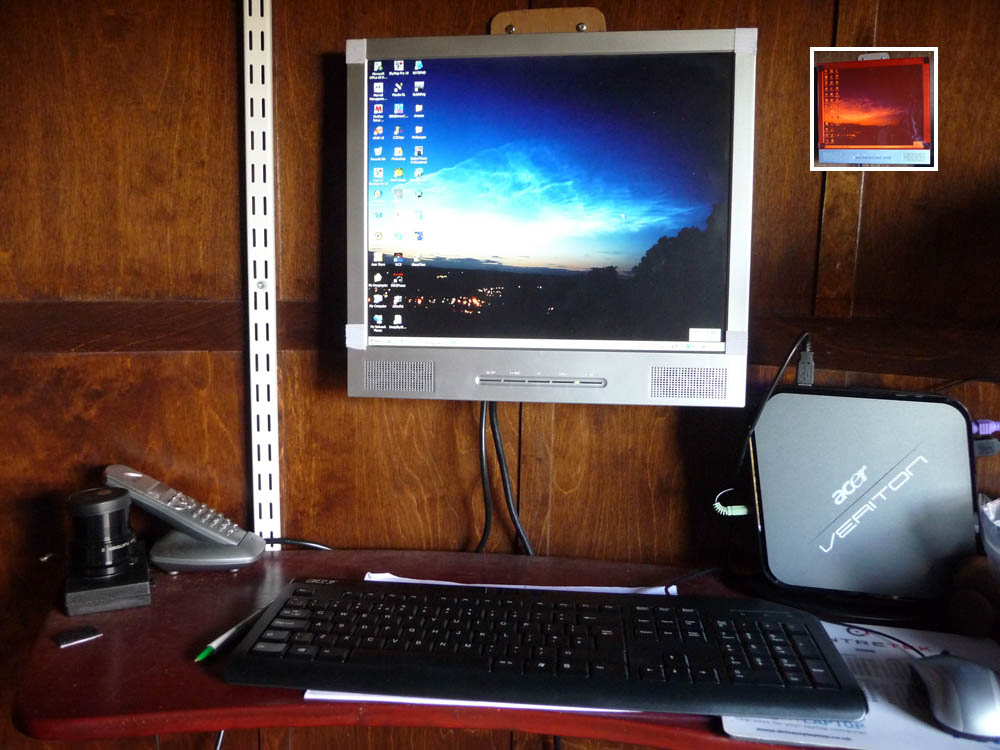
After some years of using my laptop for imaging, as it
became a little less reliable and needed extras to run
modern USB 2 equipment, I replaced it in March 2010 with a
mini computer, utilising a spare monitor. A nice permanent
installation (my laptop is still eminently usable for star
parties etc.) At night of course I have a red film over the
screen (inset).
|

|
|
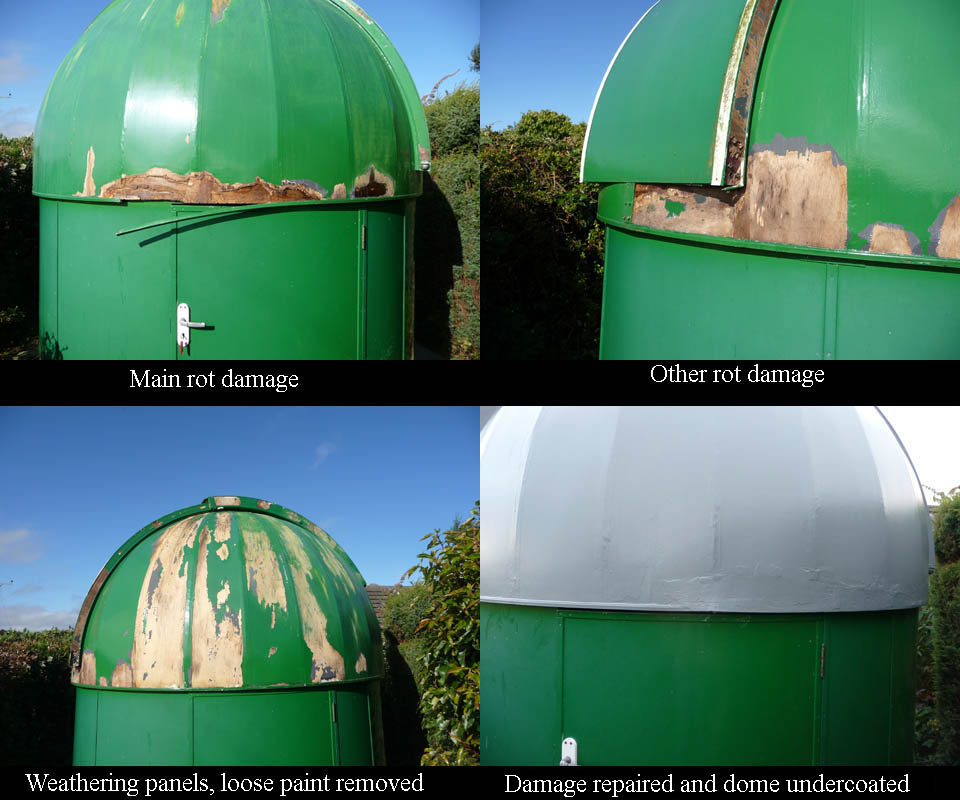
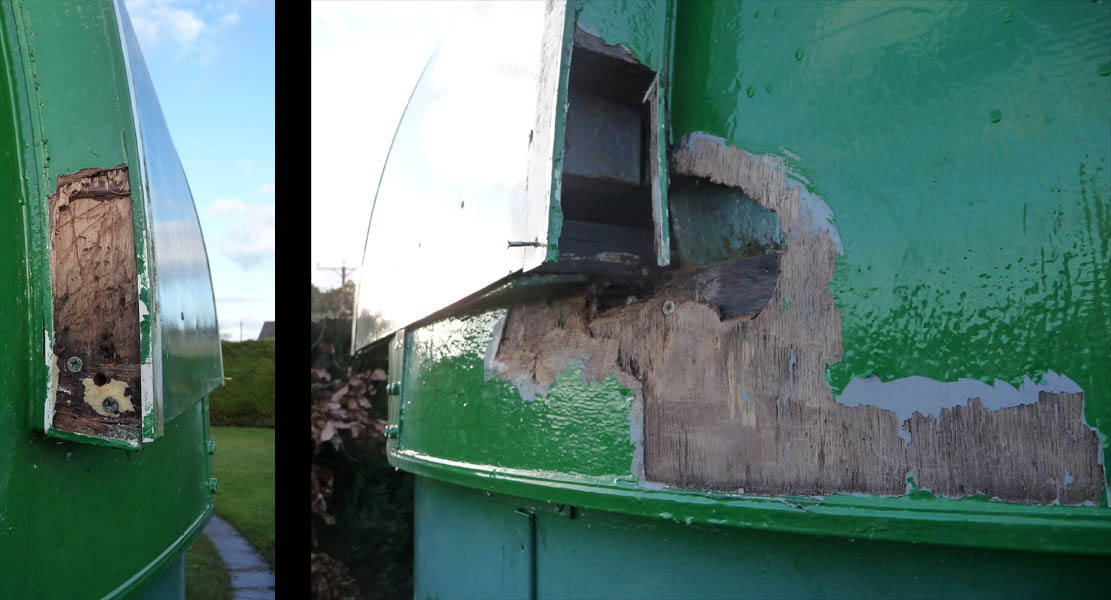
Around 2011 a bit of rot appeared on the dome above the
door. A small amount of patching seemed to do the trick. But
it reappeared with a vengeance in 2013, quite extensive and
other areas also affected. Weathering of the paint also was
greater than usual, so although it had been repainted
before, major work was necessary. Strangely in some areas
where water was lying under paint there was no
deterioration, but this time after removing the damaged wood
I gave all bare areas a thorough soaking with preservative
before starting repairs. The worst affected sections were
reinforced with fibreglass mat before filling and
undercoating.
|

|
|
There were a couple of small areas also slightly damaged at
the bottom and to the left of the door, but these were
easily fixed. Then all affected areas gloss painted.
Hopefully the repairs will stand the test of time, but I'll
have to keep a closer eye on the paintwork - clearly ingress
of water through cracks in the paint was the prime cause of
the damage. Presumably flexing of the dome combined with
temperature variations is the root cause of the cracking - I
might need to repaint every year. Unfortunately as mentioned
above the manufacturers are no longer in business, and if a
replacement becomes necessary most commercial offerings
around this size are lower and smaller. Fingers crossed!
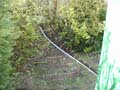
A couple of years previously I replaced the gravel path
with concrete - I found that weeds took hold despite the
presence of a membrane, and clearing up after trimming the
shrubs was a nightmare. Also walking round the observatory
late at night was rather noisy!
|
|
|
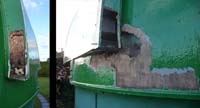
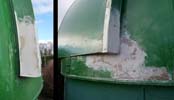
More Damage
:-(
In February 2016 I was showing a friend the Observatory
and partly closed the roof to keep out a slight shower. But
a gust of wind caught the shutter and forced it off the ball
catch which holds it in the half open position. It crashed
down on the open side buffers which had evidenced some rot
in 2013, particularly the one to the right. They were both
dislodged although held the shutter from moving further. The
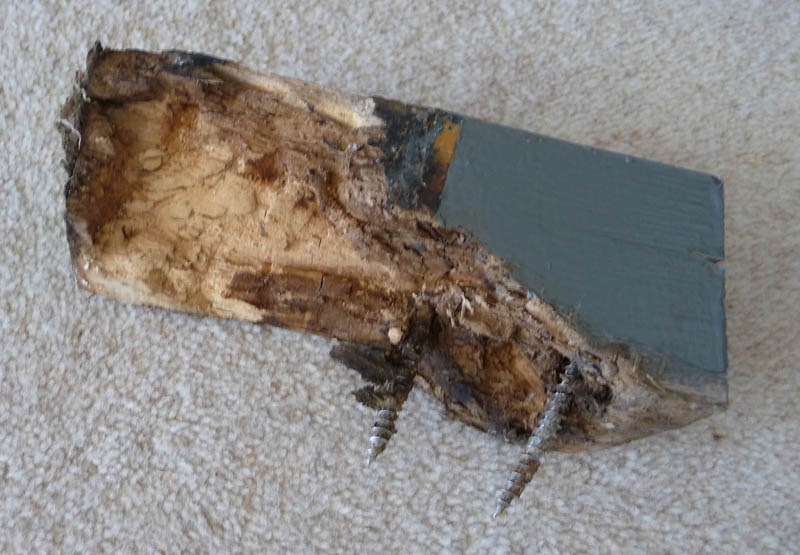
buffer on the right came away completely, exposing serious
rot damage. This was the main load bearing spar for the
buffer!
|

|
|
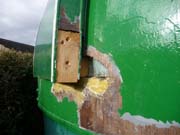
The rot had also affected the interior section that the
spar was screwed to, so that had to be repaired. And there
was extensive damage in the general area. Not so bad for the
other buffer, the underlying wood was weak but intact, and I
decided to leave it alone - I may need to dig deeper in a
year or two! The main spar which was so badly rotted had to
be replaced of course, and a further external section also
needed replacing along with a substantial area of plywood
skinning.
|
|
|
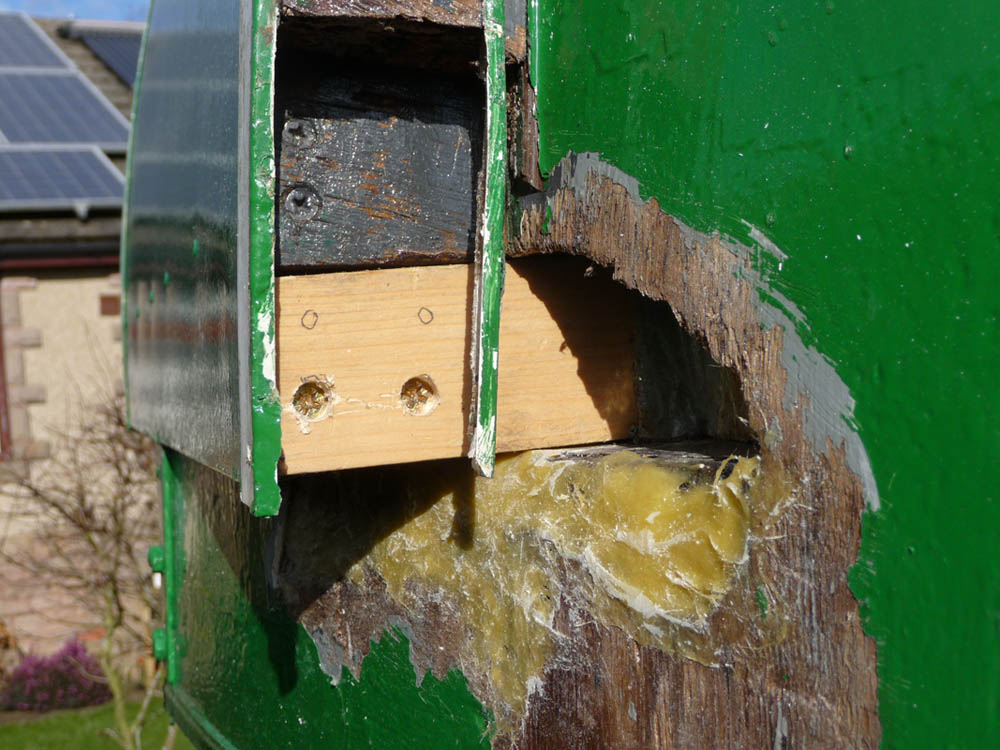
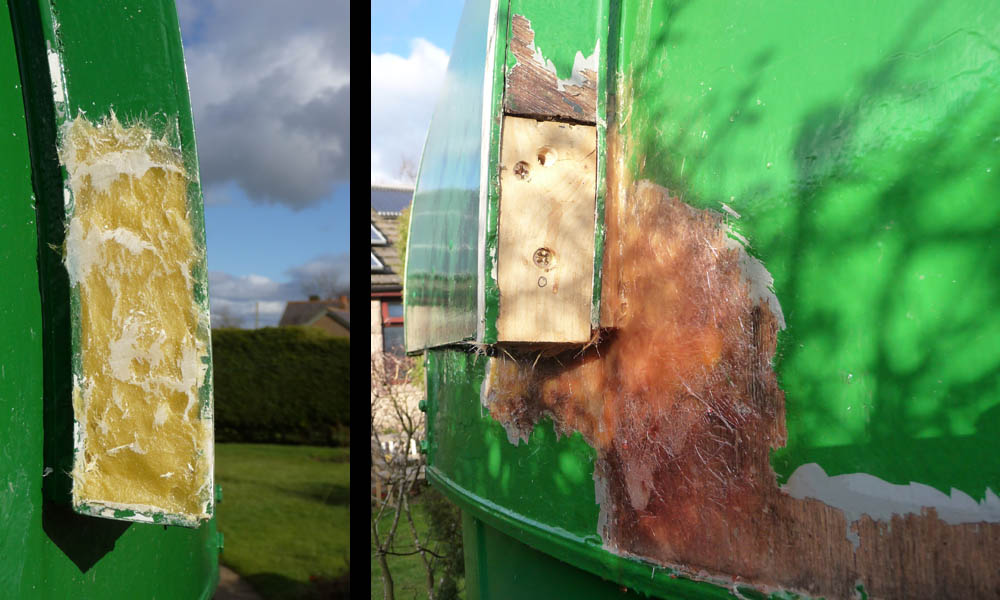
So the rotted sections were cut out and the remaining
wood treated with preservative and hardener. The main frame
was built up to the original form with fibreglass paste to
take a replacement spar. A further block of wood was then
screwed to that to accept the buffer (the empty hole was a
mistake - when I came to fit the section I realised the hole
was too high - oops!)
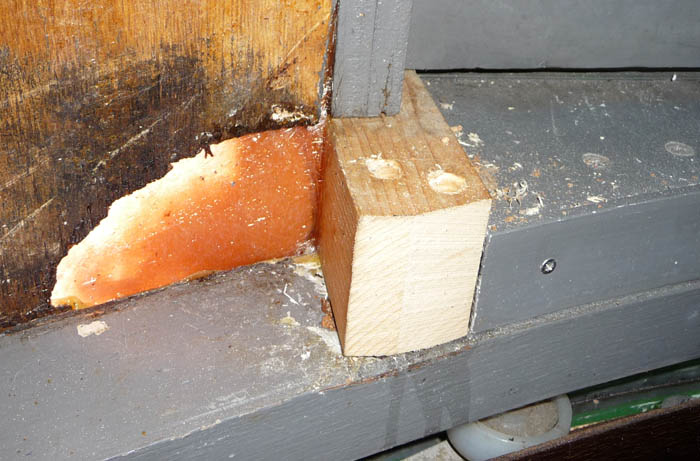
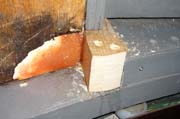
This photo shows the inner end of the spar where it is
screwed to the main frame. The orange coloured stuff is the
fibreglass later applied externally.
|

|
|
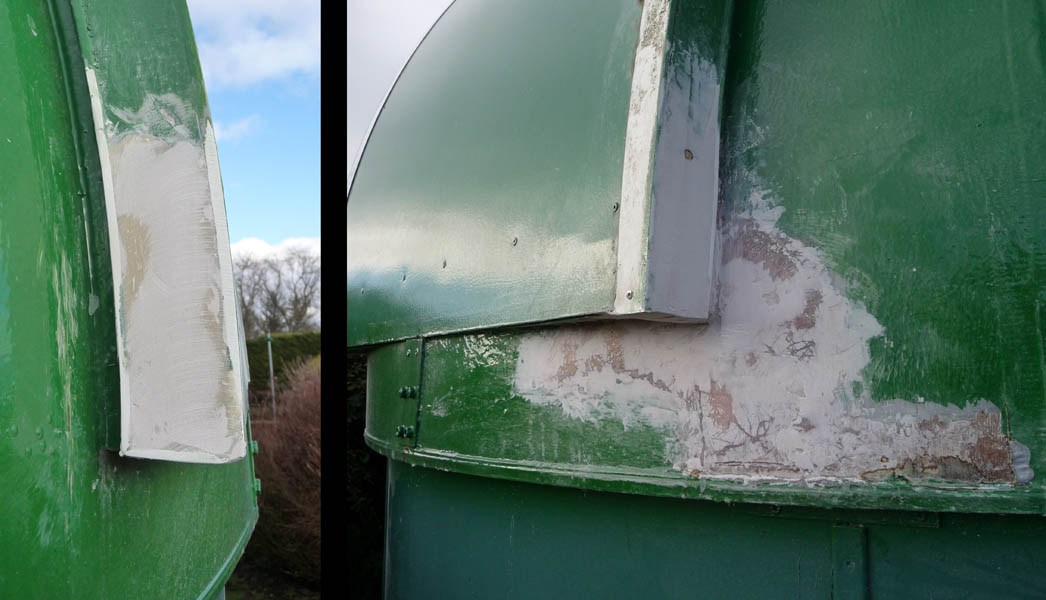
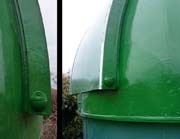
This shows the finished fibreglassing - a double layer of
mat replaced the missing plywood skinning and paste built it
up to profile as well as strengthening the fixing on the
less damaged side. A small piece of wood also helped to fill
a space where old wood was removed.
Then resin filler was used to finish profiling the
repair.
|

|
|
|
|
|
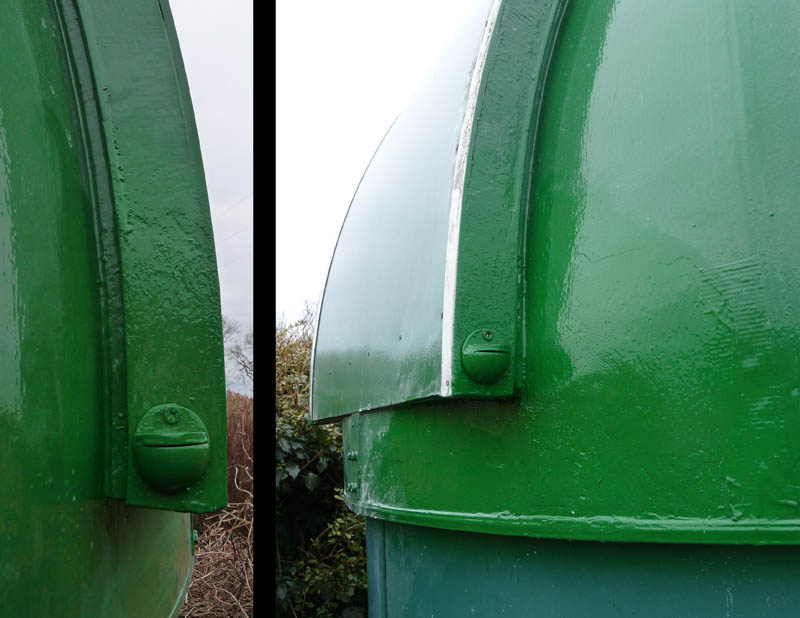
Undercoat then gloss to finish off and the buffers
refitted. Not the prettiest of jobs - I was working against
the clock to make use of a few days of fine weather (full
Moon so didn't miss the unuseable Observatory too much!), it
was cold so slower setting and drying and some bits got
stuck in the paint - I'll tidy that up another time. But
back in business. The areas at the bottom and left of the
door, mentioned in the previous repairs in 2013, also need
attention again, but can wait until warmer dryer
weather!
|
|
In Spring 2017 when I fitted a motor to the dome, more damage
became evident. See lower down on the Motorising
page.
So that's the rim repaired, but the next step is out with the
sander and paint hopefully to sort the cracked areas. And the bottom
edge of the door still needs fixing. But I'm determined to keep the
Observatory going - although there are suitable replacements
available, it would be an awful lot of work and fair chunk of
money!
A few weeks later. The door still needs attention, and despite a
quick coat of gloss, water was still getting in through cracks.
However, some serious work with a disc sander then undercoat and
gloss has cured the dome leaks afaik. Certainly after 24 hours of
rain in July it was still dry inside. Phew!! In future I'll have to
keep a close eye on the condition of the paint and have the sander
and paint ready ;-)