Starlight Xpress MX716
Sold March 2006
- the Artemis
285 proved itself a worthy
replacement
|
At the London Astrofest in February 2003, I at last
succumbed to the lure of a high end CCD Camera - a Starlight
Xpress MX716. I decided on this monochrome camera in
prefence to the single shot colour MX7C because of the
increased sensitivity - hopefully I'll eventually graduate
to a colour filter wheel.
The camera is fitted with a high sensitivity ICX429AL
Sony Exview CCD chip, 752 x 580 pixels, 8.2 x 8.4uM, Imaging
area: 6.4mm (horizontal) x 4.75mm (vertical). For full
details, visit the Starlight
Xpress Web Page.
For images taken with this camera, visit the MX716 photo
gallery page here.
|

|
|
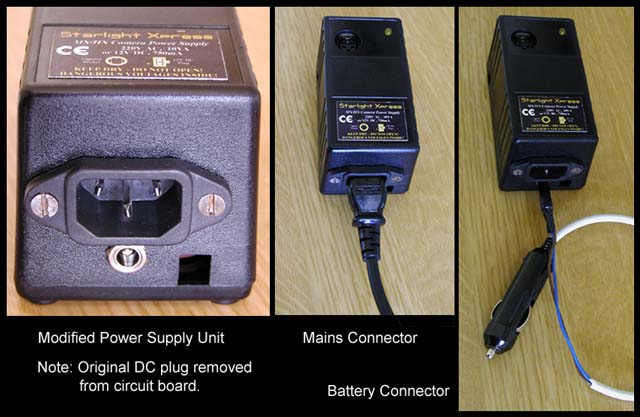
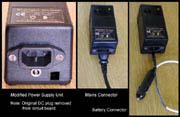
The camera was supplied with a rather clumsy arrangement
for the power supply - a permanent mains cable and a little
terminal block on the side for input from a 12 volt DC
supply. Most of my use is from a 12 volt battery, and the
mains cable was just a nuisance. So I modified the unit to
plug in either mains (using a 'kettle/computer' type socket)
or 12 volts (using a coaxial socket) - much tidier!
Because of the dangers inherent in working with mains
voltages, I am not giving details of how to carry out this
modification - anyone attempting it should be able to do it
correctly and safely without instruction. If you can't, you
should obtain the services of a competent person.
I will not be held responsible for
any accident or damage resulting from incorrectly performed
modifications.
|
|
STAR2000 Self Guiding.
Because of the construction of the CCD chip used in the MX series
cameras, it is possible to use half of each pixel as a guiding
imager. The only drawbacks are that twice the time is needed to get
the same depth of image, and some amplifier glow is recorded in the
final image, although provision is made to remove this. The system
comes complete with an interface box and suitable software. See the
Starlight Xpress web
site for more details.
Many telescopes have 'Guide' input sockets, and the system can
generally accommodate them without extra hardware, but some of the
lower end Autostar equipped Meade telescopes do not have a guider
socket. The #909 Accessory Port Module (APM) from Meade addresses
this problem, but is not recognised by all systems. An alternative
method is to communicate directly with the Autostar via the 4-way
RJ11 input socket. This requires a modification to the 6-way
connector from the STAR2000 unit, either by replacing it with a
4-way, or making an adapter unit which retains the original STAR2000
connector - in my opinion the better solution.
Terry Platt of Starlight Xpress states:
" The new plug is very easy to fit, as the cable cores are all in
a row and cannot become misaligned. If you want to modify an existing
cable, mark the cable wall at the end that you are going to replace
so that you know which way round the 6 way plug has been fitted. Now
cut the plug off the cable and strip back about 6mm (quarter inch) of
the outer cable sleeve to expose the coloured cores. Snip off short
the outermost single cores on each side, so that the four middle ones
are left projecting. Now slip the new 4 way plug onto the 4 cores,
with its orientation the same as the original plug. Some connectors
need to be 'crimped' into place with a little hand tool, so you
should check if you need this when buying the plug."
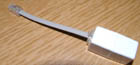
Rather than cut off the existing plug, I have made up an adapter
as follows:
The parts I used (all from Maplin - http://www.maplin.co.uk/ ) are
:-
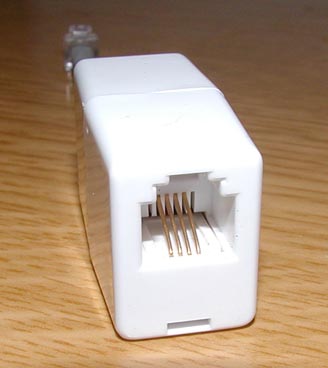
Inline Reverse Coupler RJ11 - part no. SN88 If you can't get a
reverse coupler, a pin-pin will do, but then you'll have to turn one
of the plugs through 180 degrees. Note that this unit accepts 6-way
RJ11 plugs, but only connects to the centre 4 terminals as required
in Terry's instructions.
An alternative part number is Maxview TP724
RJ11 4C4P Plug - part no. JW42. 4 contacts in a 4 position shell.
This is the one that plugs into the Autostar.
RJ11 4C6P Plug - part no. JW43. 4 contacts in a 6 position shell.
This plugs into one end of the coupler. A 6-way shell is required
because the coupler is sized to accept 6-way plugs. The 6-way plug
from the STAR2000 box (LX200 output, MX program guiding default set
to LX200) goes into the other end of the coupler.
Also a few inches of 4-core FCC-68/Data Cable - part no. XS27E
This may be for a 1 metre length at £0.39, but I'm not sure -
you'll need to talk to Maplin! I already had some wire in my parts
bin.
I bought 2 each of the plugs in case I made a hash of manually
fitting them (see below), and the total cost including VAT of the
bits (excluding wire) was UK£3.95
As Terry says, you just need to remember that the wires going into
the Autostar need to be in the same configuration as though you cut
off the 6-way plug from the STAR2000 cable and fitted a 4-way one in
its place.
Although ideally you should have a crimping tool to fit the RJ11
plugs, it's possible *with care* to push down the contact blades with
a screwdriver.
|
Coupler
|
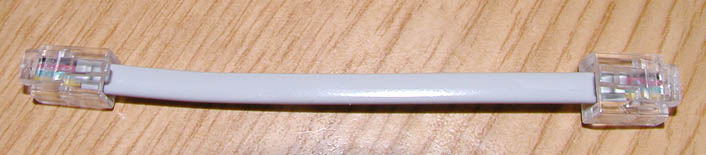
Link wire
|
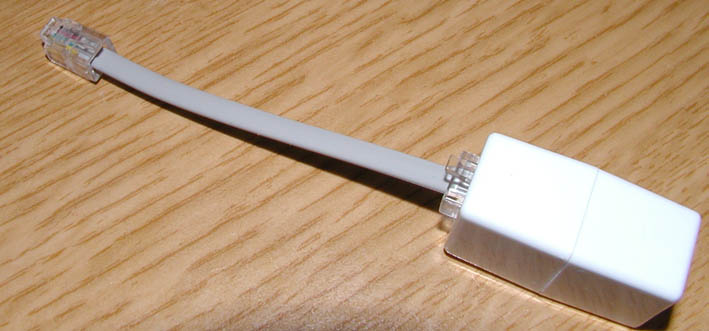
Assembly
|

|

|
|
For guiding you should initially set the Autostar to speed 1.
Experimentation encouraged!!