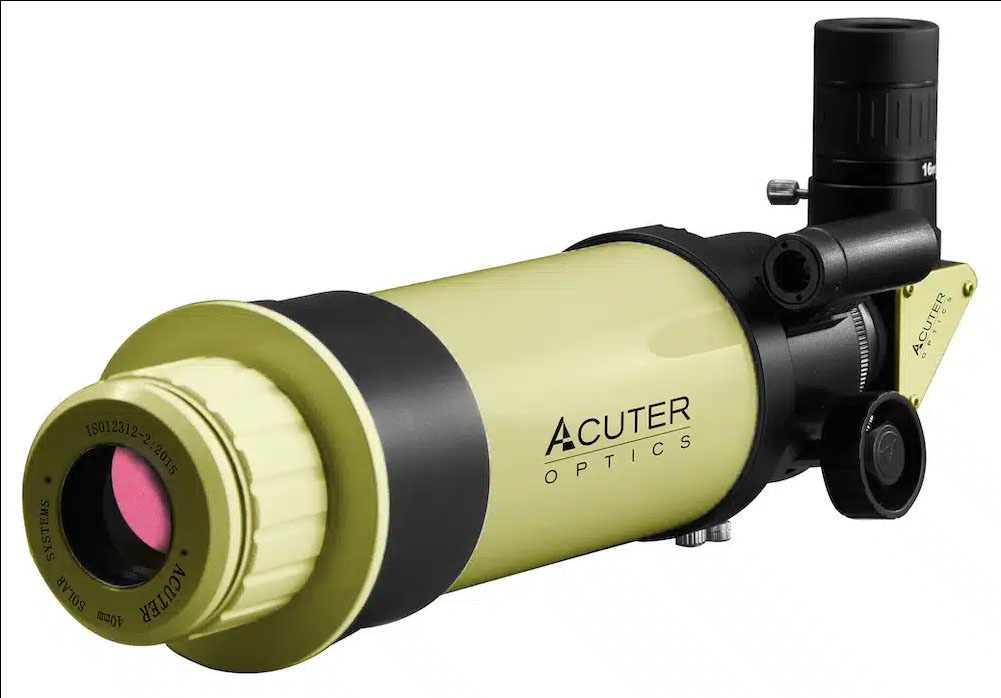
This f/10 H-alpha Solar Telescope replaced my ailing Solarview50 and was received on 9th January 2025. Fortunately the Sun was still very lively as it approached the end of the current period of maximum activity, and I was able to capture very many satisfying images as can be seen lower down in my Solar page.
As always click on the thumbnails for larger images.
|
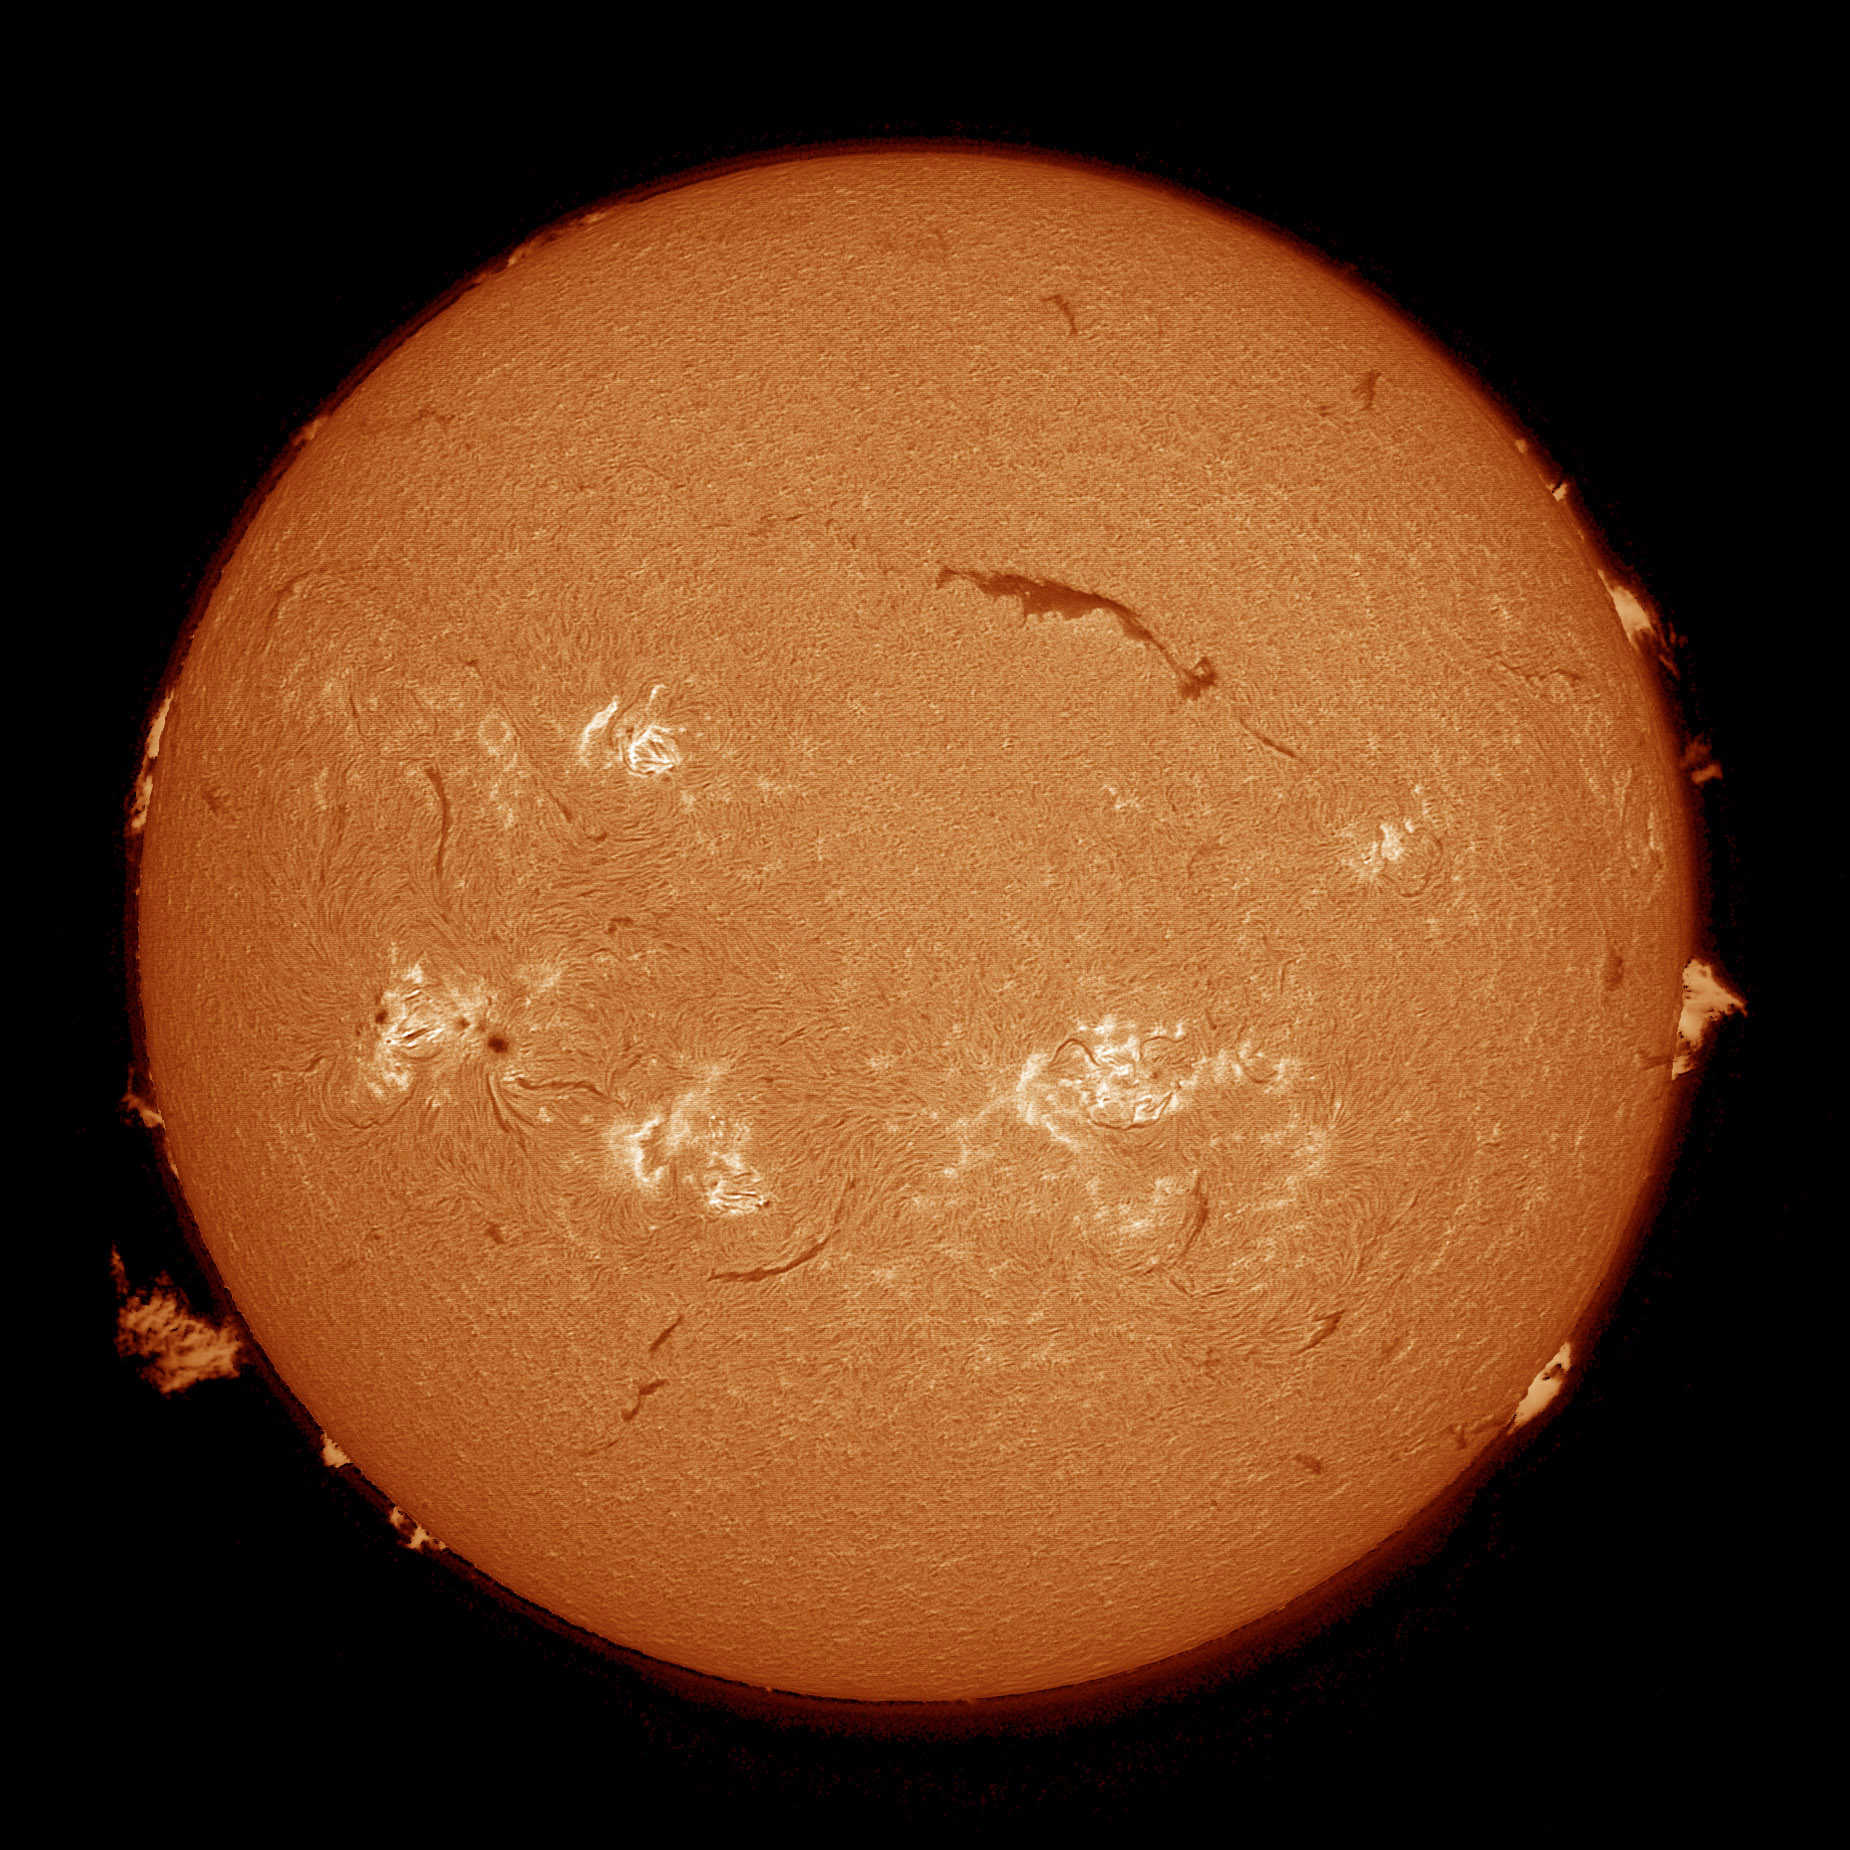
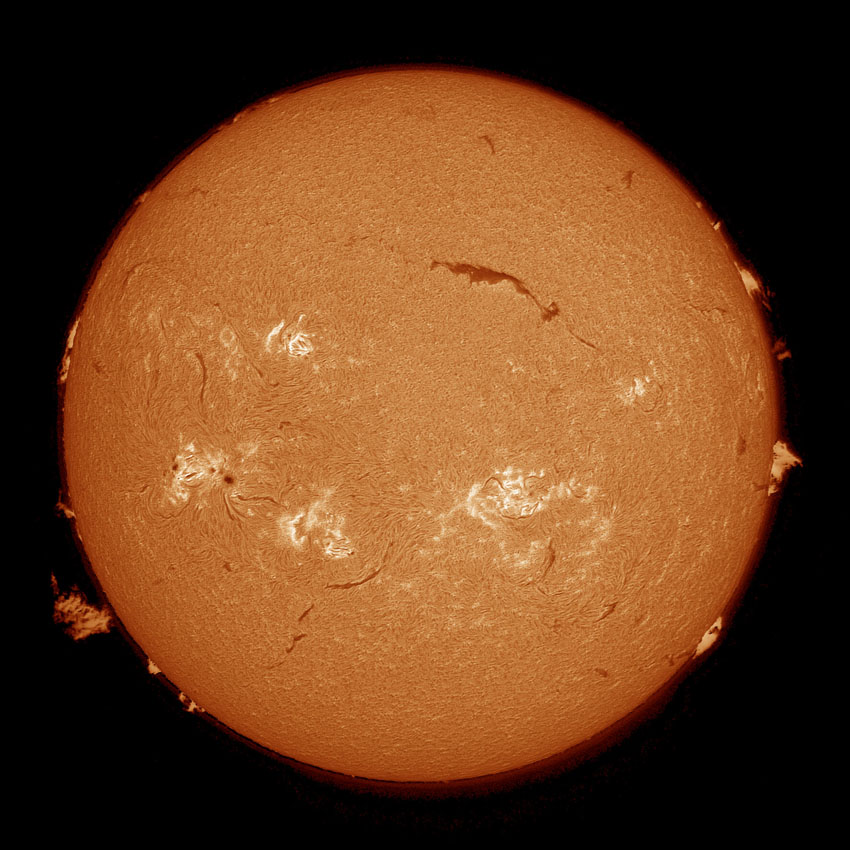
Here is a typical image, from 27th June 2026, beautifully showing many surface features and prominences, all at the same time without having to alter tuning settings. Here is the full size image. The camera is an Altair GPCAM3 178M (monochrome), 90 second video processed and coloured using Autostakkert, Registax and Photoshop.
The telescope is very highly thought of , this review says it all. Also see my Solar Scopes page.
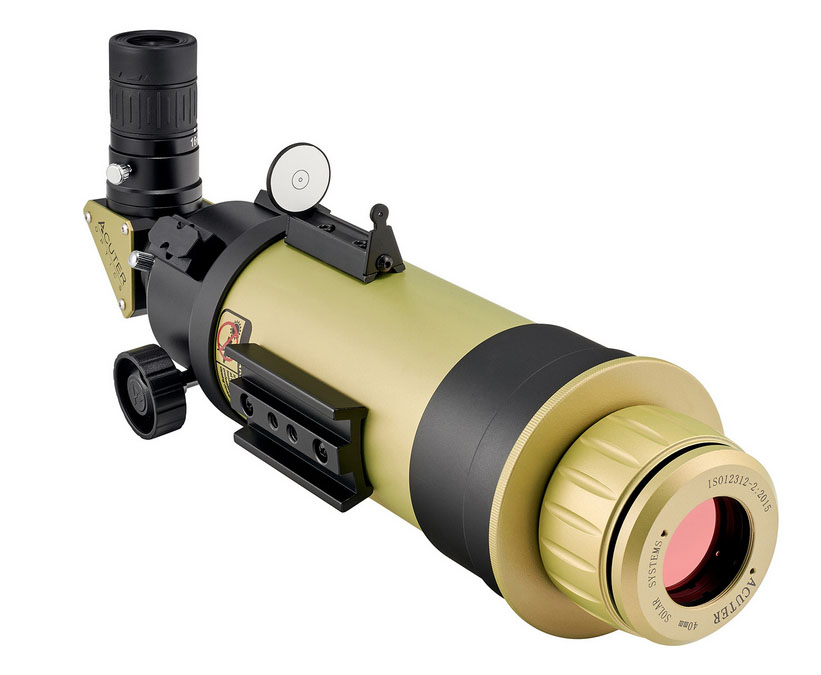
It has been improved since I bought mine with a more practical Solar finder as you can see in this image (courtesy First Light Optics, July 2026). The original finder is very accurate, but because it must be viewed from behind, my head has to be carefully positioned to avoid being dazzled by the Sun. |
|
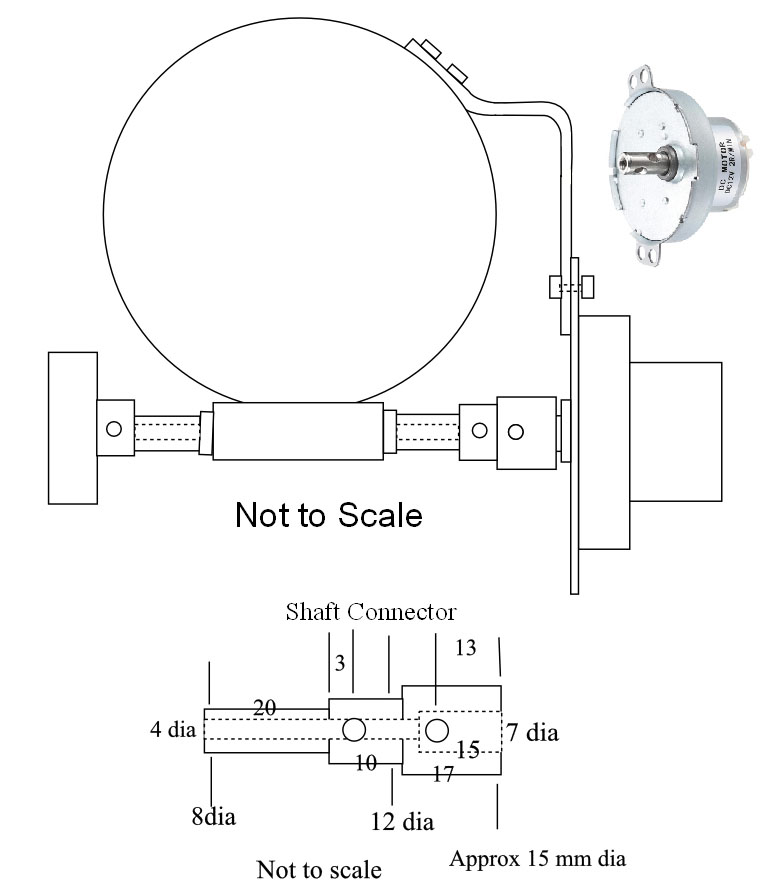
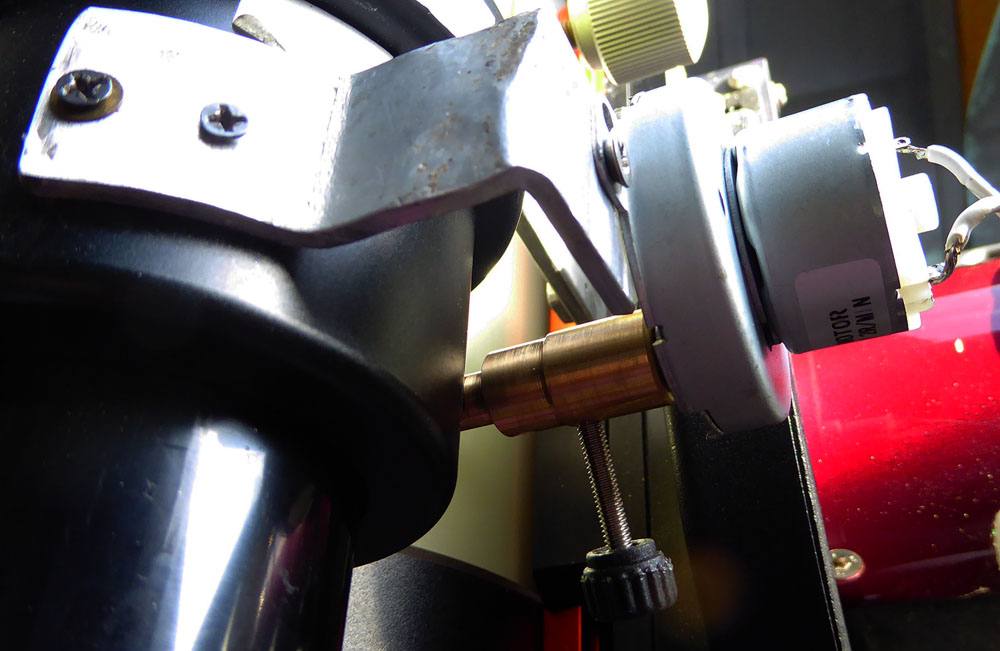
As you can see , the focuser is single speed - it does not have a secondary fine focus knob. But is very smooth and precise, so in general there is no problem with focus. But imaging is a different story. Obviously I have to look at the computer screen when focussing. In my Observatory I can usually reach the focuser without too much difficulty, and have a suitable view of my computer screen. But when away from home it is a different story. It is usual to hide from the Sun with a cloth over the head and laptop screen, so accessing the focuser becomes a struggle. So I decided to make a remotely controlled motor focuser. An initial experiment with a small motor from a damaged wing mirror was only moderately successful - there was a fair bit of backlash from the method I used - an O ring connection to the focus knob. So I determined to make one which would be more accurate.
|
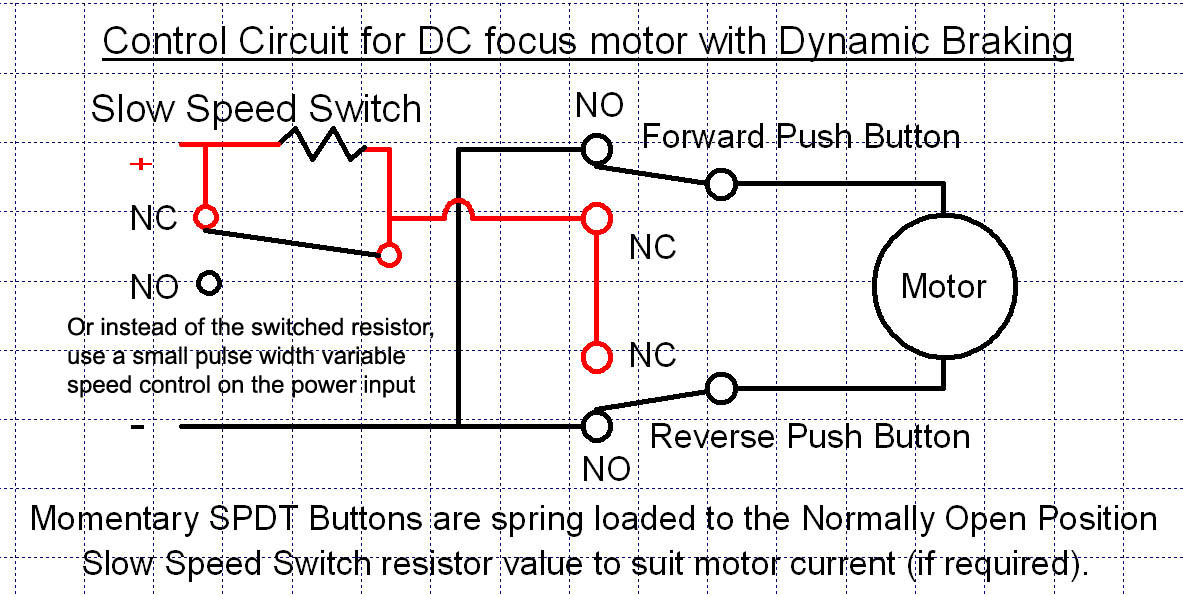
I decided to connect the motor directly to the focuser shaft, so the first thing to do was to source a suitable motor. Most commercially available motor focusers now use stepper motors with electronic controllers also capable of being driven by computer focussing software. But such a thing is far beyond my limited skills, so I went for the 'dinosaur' route, using a 12 volt DC motor and suitable control switching. The circuit I decided to use was this one, which I designed several years ago for a similar project.
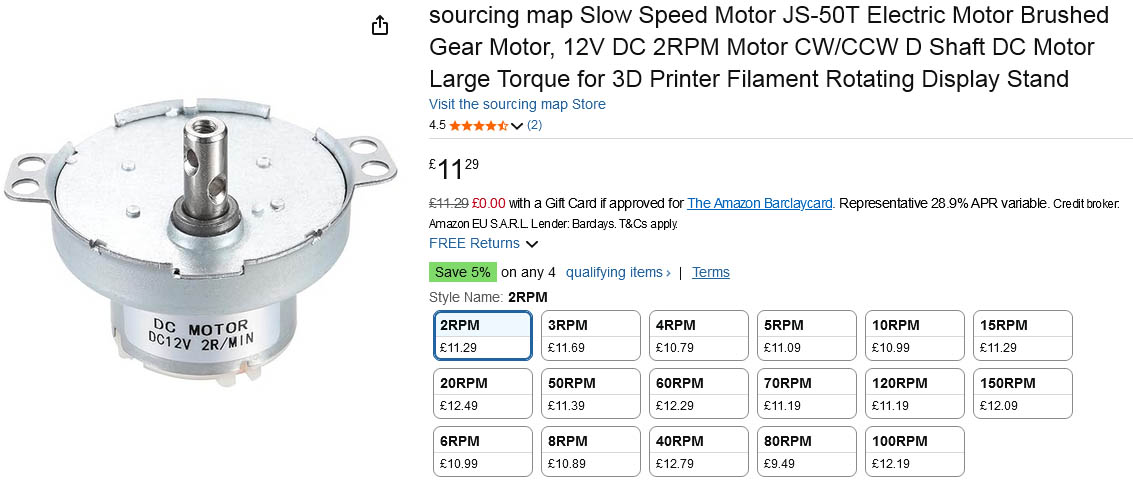
I found a motor on the internet which was geared down to a slow 2 rpm, and duly purchased it. I found that it actually ran at nearer 2 1/2 rpm, but knew I could slow it down if necessary. On Amazon here. I don't know how long that link will be active, but here is a crop from the web page. As you can see it is available in numerous speeds. At one point I tried a small pulse width voltage controller, which worked well to alter the speed, but in the end went for a fixed resistor - much easier to simply switch to a lower speed for the final focussing, and no electronics to go wrong! The dynamic braking helps with the accuracy - there is no overrun when the control button is released. |
|
|
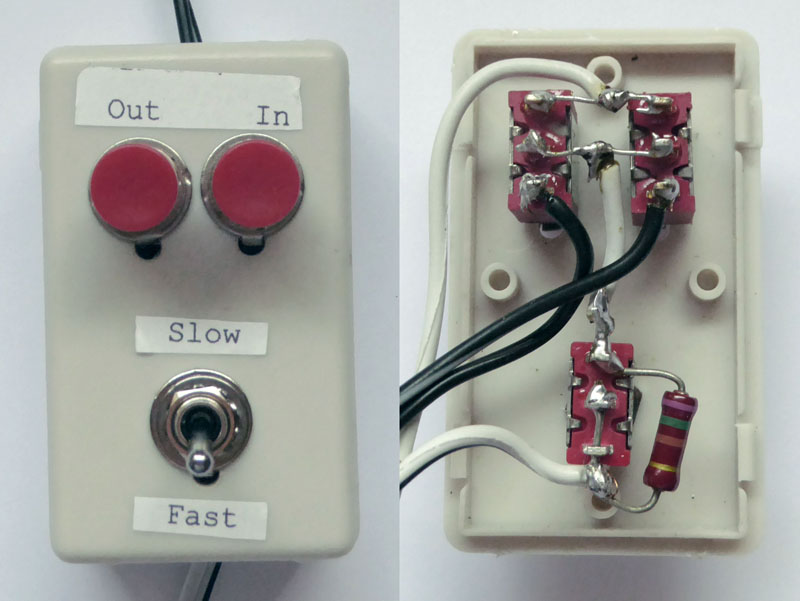
Here is the finished controller. I ended up with a 720 ohm resistor which nicely slowed the motor to less than half the original speed without it stalling. All went together well and works fine. And a video of the unit running at full speed is here. IMPORTANT If anyone is considering using my circuit, be aware that the controller must always be connected so that the output terminals go to the motor. Black wires in this photograph. This is because when the control buttons are not pressed the motor is shorted out to give dynamic braking. If connected the wrong way round the input power will then be shorted with possible disastrous consequences!! Although in the assembled photo there are white wires attached to the motor, they have an in line connector. The black wires definitely go to the motor via that connector. |
![]() |